Jellied meat in a saucepan. How to make delicious jellied meat at home
Fragrant transparent jellied meat is a frequent guest at many holiday feasts and celebrations. For some, the main decoration of the holiday table is exotic dishes and tropical fruits. But many people prefer traditional, but no less tasty food, which includes jellied meat. It is also often called jelly. However, not every young housewife will risk making jellied meat - the recipe is not as simple as it might seem at first glance. The process has its own nuances. In order for the jellied meat to turn out not only tasty, but also transparent, appetizing and simply beautiful, you must follow some rules for its preparation. Do not neglect these recommendations - and jelly will definitely become your signature dish, a real decoration for any holiday feast.
How to choose the right meat for jellied meat?
The first rule for preparing clear and tasty jellied meat is choosing a base for the dish. To cook jelly, you can use almost any meat of your choice - pork, beef, chicken or turkey. However, many experienced housewives recommend choosing beef. Since you can prepare beef jellied meat only from some, you need to take meat on the bone, a part of the drumstick that is located closer to the hoof, or a beef shank with veins, cartilage or skin. This choice is due to the fact that they contain special gelling agents that promote rapid solidification of the broth without the use of gelatin and do not make it cloudy in appearance. You can use one or several types of meat.
When purchasing a meat kit for preparing jellied meat, be sure to ensure its freshness. If the beef has a specific “old” smell, small spots on the surface, visible traces of frequent freezing, defrosting, or too dark a color, it is better to refuse to purchase such a product, since it will not be possible to cook tasty jellied meat from it. Be sure to ensure that the meat set has approximately the same content of pulp and bones. If there is too much beef pulp, the jellied meat simply will not harden. The same goes for too much bone content. Therefore, the most important thing is moderation in everything.
Food preparation
So, fresh meat has been selected for cooking jellied meat. Next, it needs to be properly prepared. The beef should be soaked - this helps get rid of traces of blood and provides a beautiful transparent base for the jellied meat. If the meat is not soaked, the broth will be cloudy and unappetizing. Place the beef in cold water and let it sit for a couple of hours before cooking the jellied meat. The recipe for any housewife is the same in that the meat must be completely covered with water, otherwise the remaining traces of blood and the hardness of the skin cannot be avoided. After soaking, you can safely start cutting. To do this, it is better to use a special butcher knife or a hacksaw with large sharp teeth - it can be used to saw through beef bones so that there are no small fragments. If you simply chop beef with a hatchet, you will definitely have sharp edges on the bones. Next, trim the meat with a knife, freeing it from bone fragments, and prepare other ingredients for preparing the dish.
Ingredients needed to make jelly
- Beef or meat set weighing from 2 to 4 kg.
- Clean cold water, preferably purified.
- Salt to taste (see below for information on when to salt jellied meat).
- 2-3 large onions.
- 2-4 large carrots.
- Garlic cloves - 6-8 pcs.
- Spices and herbs of your choice - bay leaf, black peas, red pepper, celery, dill.
The main stages of preparing jellied meat

Read on to learn how to prepare delicious jellied meat. Place the prepared meat set in a saucepan and fill with clean cold water. It is better to choose purified or filtered water for preparing this dish. If you use regular tap water, there is a very high probability that the broth will appear cloudy. In addition, tap water has specific impurities that can give the finished jelly an unpleasant aftertaste. Water should be taken in a 1:2 ratio to meat - this means that for 1 kg of beef you will need 2 liters of purified cold water. Place the beef pieces very tightly so that the meat is completely covered with water. We put it on fire.
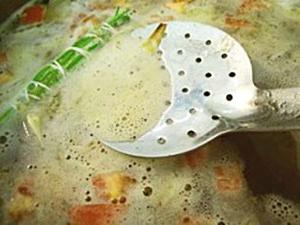
So, how to cook jellied meat correctly. After 20-30 minutes, as soon as the broth boils, you need to carefully collect all the foam on its surface. The foam will rise throughout the cooking process, so it is very important to carefully collect it regularly at all times. Thanks to this process, the broth will remain clear and beautiful to look at. Many famous chefs recommend not collecting the foam, but completely draining the first water in which the meat was cooked for jellied meat. Drain all the water, and rinse the beef thoroughly under clean running water - this will clean the meat of any remaining foam and bone fragments.
How to achieve a transparent color in the finished dish?
A question that torments not only novice housewives: how to make jellied meat transparent? Everything is simple here. Place the washed parts of the meat set back into the pan and fill with water, grinding again if necessary. After which the pan can be put back on low heat. Now, if foam or fat appears on the surface of the broth, you can simply remove it with a slotted spoon. As mentioned above, jellied meat is cooked over low heat - which is why the entire process of preparing this dish can take from 5 to 10 hours. You should not increase the heat in an attempt to speed up the long cooking process - the broth will become cloudy, and your jellied meat will turn out unattractive and unappetizing. In addition, long cooking over low heat helps the finished jellied meat harden perfectly - you do not need to use gelatin or other substances.
Rules for adding spices and herbs

After the jellied meat has been boiled under the lid for 4-5 hours, it is time to add spices and herbs. This happens until the moment when salting jellied meat (including beef) becomes necessary. These ingredients should not be added before the specified time - by the end of cooking they will lose their taste and characteristic spicy aroma. For jellied meat, it is recommended to use whole vegetables without chopping them. You can take carrots and other vegetables directly in their peels without peeling - just rinse them thoroughly under running water. If you don’t like this method, peel the vegetables, but don’t cut them into pieces. Many people add a whole unpeeled onion to the jelly being prepared - this trick helps give the broth a light golden hue. Garlic cloves can be placed in any form convenient for you - whole or chopped. At the same time, add various spices to the future jellied meat according to your taste - black pepper, allspice, celery or parsley root, and bay leaf give the dish a special piquancy and incomparable taste. But in no case should you be too zealous with the amount of spices - the finished jellied meat has an incredibly delicate and refined taste, which can be easily spoiled by hot spices.
When should you salt beef jellied meat?
The basic rule for a tasty and appetizing dish is proper salting. When to salt jellied meat? Remember that the jellied meat must be salted 20-30 minutes before the end of its preparation. If you add salt to your dish earlier, the result will certainly disappoint you. Meat absorbs salt strongly. And even a small amount of it, poured at the beginning of cooking, can make your dish simply inedible. In addition, the broth must be simmered over low heat for at least 5 hours - during this time the water in the pan boils away greatly, so the concentration of salt in the broth becomes excessive. The best option for when to salt jellied meat is half an hour before the end of cooking.
Grind cooked meat correctly

After the jellied meat is cooked, turn off the heat and carefully remove the cooked meat from the pan using a slotted spoon. Whole onions and carrots can also be harvested - they have already served their purpose. Cool the cooked meat slightly. Next, the cooked meat must be thoroughly chopped. This can be done simply with your hands or use a small knife, with which you carefully separate the pulp from the seeds and cartilage. Many people prefer to use a food processor or meat grinder to grind meat, but in the case of preparing jellied meat, it is better to avoid such methods, since with this method of grinding the finished dish loses its unique exquisite taste. Make sure that there are no small bones, skin or cartilage residues in the finished meat. Grind the garlic cloves through a press and mix them with the resulting meat. It is better not to cut the garlic with a knife, but to press it through a special press - this way it will mix better with the beef and there will be no large, sloppy pieces.
Pouring cooked meat correctly
Place chopped meat and mixed with garlic at the bottom of deep plates or trays. If you want to make your culinary creation brighter and more original, you can put pieces of boiled yolk or carrots, as well as any other products of your choice, on the bottom of the plates. The meat must be poured with the resulting salted broth (we have already mentioned when to salt jellied meat). To do this, it should be carefully strained through a fine sieve or gauze cloth folded in half. In this way, small pieces of cartilage and bones and excess fat are removed from the broth. As a result, it acquires an even, pure color and a pleasant shade. Heat the strained broth slightly in a saucepan over low heat and pour it into the molds with the cooked meat. If you use gelatin when preparing jellied meat, now is the time to add this ingredient to the broth. To do this, take a glass with already prepared and strained broth, dilute one packet of gelatin in it and add the resulting mixture to the rest of the broth before pouring it into the molds.
Freezing of jellied meat
It would seem that for housewives the most controversial issue is the question of when to salt jellied meat. But it is not so. There is one more stage in the preparation of this dish, which raises quite a lot of questions - freezing.
For the jellied meat to completely harden, it takes quite a significant amount of time - from 4 to 10 hours. You can leave the molds with the aromatic meat dish for the whole night. In order for the cooked jellied meat to harden, it will need a cool temperature, which is below room temperature. You can leave the dish on the balcony or on the windowsill - but these places are completely unsuitable in the winter season. At low temperatures, delicate jelly left on the balcony will simply freeze and completely lose its unsurpassed delicate taste. The best option for quickly and efficiently freezing jellied meat is the refrigerator.
It is better not to place dishes with beef jellied meat on the top shelf of the refrigerator - as you know, this is the lowest temperature zone, and your meat delicacy will simply freeze. It is not recommended to place molds with beef jelly on the lower shelves of the refrigerator - here, on the contrary, it will not harden. The best choice would be the middle shelf with optimal temperature conditions.
So, you have learned how to properly prepare and when to salt jellied meat. And everything was done according to the recipe. Now your culinary masterpiece is ready, but what to serve it with? The traditional answer to this question is various hot sauces, mustard, horseradish or adjika. You can serve a delicate meat dish with a small amount of soy sauce - it will give the jellied meat a special piquancy. A very tasty combination would be jelly served with pickled mushrooms or cucumbers, fresh or canned tomatoes, and a fresh vegetable salad with herbs of your choice.
The most important nuances
To make beef jellied meat truly tasty and appetizing, follow a few simple rules for preparing it.
- The basic rule on how to make jellied meat transparent is to never add water to meat that is already being cooked. If you add a new portion of water to the broth during the cooking process, it will lose its beautiful transparent color and become cloudy. In addition, such a broth almost never hardens without the addition of gelatin. In this case, it is best to immediately pour a little more water into the pan with beef than you need - when it boils, the required amount of broth will remain, and its color will not be affected at all.

- Let's repeat when to salt jellied meat during cooking. When preparing tender meat delicacies, you should not do this at the beginning or middle of the process. When cooking, the broth boils away and becomes richer, and the salt concentration increases significantly. That is why even a small pinch thrown into a pan of jelly at the beginning of cooking can make it over-salted and inedible.
- Many people do not like the specific fatty taste that ready-made jellied beef or pork can have. A simple method helps to avoid such an unpleasant phenomenon - be sure to drain the first water in which the meat was cooked. This way you will not only remove excess fat from the meat broth, but also make the finished dish heavy on the stomach.
- You should not try to put 10 kg of various meat products into a pan with broth. Remember that the water in the pan should cover the meat by at least 2-3 cm. This is necessary in order to obtain the required amount of clean and aromatic broth. If there is initially too much water in the pan, it will not boil away during the cooking process, and the broth will not solidify well. At the same time, if you add too little water, the opposite problem will arise - it will quickly boil away and you will have to add a new portion of water to the pan. In this case, you cannot avoid the appearance of an unpleasant cloudy tint in the finished meat dish.
- 5-10 hours - this is how much jellied meat needs to be cooked. The recipe does not tolerate haste and sloppiness.
- Many experienced housewives recommend not throwing away the meat cartilage and skins that you take out after finishing cooking the beef. Grind these products thoroughly using a knife, meat grinder or food processor, then carefully mix the resulting mixture with the cooked beef. As you know, the cartilage and veins contain special substances that contribute to the rapid hardening of the finished jellied meat without the use of gelatin. At the same time, the taste of the delicate dish does not deteriorate at all.

And finally
Since cooking delicious jellied meat is a painstaking task and requires a certain skill, you should not be upset if your first jellied meat did not turn out quite as you expected. A little culinary practice and patience - and your dish will become the main decoration of any holiday table.
- Beef shank (joint with pulp), leg and part of the shank - the weight of the entire meat set was 4 kg,
- Onions – 2 heads (large),
- Carrots 2-3 pieces,
- Bay leaf,
- Black peppercorns,
- Garlic 7 - 8 cloves,
- Salt,
- Water – 4 l.
Cooking process:
Before you start cooking beef jellied meat, you need to buy the right and fresh meat. After all, in order for the jellied meat to turn out not only tasty, but also beautiful, so that it retains its shape after hardening and does not spread throughout the dish, you need to choose the right meat parts. It is recommended to choose meat with joints and cartilage. Legs are considered mandatory for preparing beef jellied meat. Very often, the front shin or part of the cow’s leg above the knee (motoleg) is used to prepare jellied meat. This is where the gelling substances are contained. With these meat ingredients, you don't have to use additional gelatin. With it you will get aspic.
To fit the legs more tightly into the cooking container, they need to be chopped into pieces. There are approximate proportions of water and meat when cooking jellied meat; the correct ratio would be 1:1. If the beef is not divided into parts, then it will not be possible to fill them with less liquid. If possible, it is better to cut the legs with a hacksaw. This way the bones will be free of small fragments. Although, in any case, the broth will have to be filtered.
 Now you can start preparing a wonderful holiday or weekend snack. Meat components should be freed from bone fragments, filled with water and rinsed thoroughly. Before doing this, scrape the legs with a knife and, if necessary, tar them.
 Take a large saucepan, place the meat on the bones and legs into it and fill it with water. When packed tightly, the water should lightly cover the meat. I prefer to pour boiling water over the meat, although many people pour cold water over it. We wait for the contents of the pan to boil, remove the foam and reduce the heat to minimum.
It is believed that the slower the boil, the clearer the broth. I can’t say this, since I’ve never cooked jellied meat over high heat. Yes, and with strong boiling, a lot of liquid boils away, but you can’t add a new portion of water, it won’t make jellied meat. Cook the meat for 4-5 hours over medium heat under the lid.
 Meanwhile, prepare the roots and spices. Onions and carrots can be placed whole with husks and skins, simply rinsed under water. Or, as I did, clean it. How to use garlic is up to you. Some people like to add it crushed to already boiled meat when cutting it into fibers, while others can’t stand fresh garlic in jellied meat. In addition to the suggested ingredients, you can add parsley and celery roots. Or use a mixture of ready-made seasonings for jellied meat.
 After the specified time, add peeled onions, garlic cloves and carrots to the pan with boiled meat; we will not cut the vegetables. And don't forget about salt and spices. We choose spices to suit our taste. Approximately add a small heaping tablespoon of salt to this volume. To avoid oversalting, taste it. Now boil the jellied meat for another 2.5 hours over medium heat.
 We remove the carrots and onions from the broth; we will no longer need them.
 Remove the boiled meat parts and bones to a plate.
 The meat needs to be cooled slightly so that it is comfortable to work with and does not burn your hands.
 Now here’s an important point: you need to separate the meat from the bone, trying to feel all the small bones on it that might remain. The meat separated from the bone, along with the veins, must be cut immediately; determine the size of the pieces yourself. Grind randomly, dividing the pulp into fibers with your hands, or finely chop using a knife.
 Place the prepared meat into molds into which we will pour the jellied meat. If desired, you can place bright slices of boiled carrots, fresh herbs, canned peas and corn, and boiled quail eggs on the bottom of the molds in front of the meat layer. At this stage, you can add chopped fresh garlic and ground black pepper, mix them with the pulp.
 Beef broth, before pouring into molds, must be strained through several layers of sterile medical gauze. This way, small bones will not slip through, and the broth will be clearer.
 Pour the strained broth over the delicious boiled beef. If you like your jellied meat to have a lot of jellies, like in my final photo, fill the mold with meat to about a third of the volume.
 We send the cups with the future beef jellied meat to the refrigerator. In winter, this can be on a balcony or in a room where the temperature is below room temperature. Let the jellied meat set overnight.
 Beef jellied meat is served with mustard or horseradish, which are a classic addition to this cold appetizer. This homemade beef jellied meat will be a worthy decoration for any table, the main thing is to cook it with soul. I hope that the step-by-step recipe presented will help novice cooks, and will remind experienced housewives how to diversify the table. After all, the dish is not only beautiful and tasty, the benefits of jellied meat have long been proven by doctors. When my daughter broke her arm, the doctor prescribed her a special diet, which necessarily included jellied meat, which helped the fusion of bone tissue.
How to cook jellied pork and chicken in a slow cooker we talked about it on our website.
Product set:
- beef tail (from the carcass of a young cow) - 1 pc. weighing approximately 0.8-1 kg;
- meaty shanks - 2 pcs. (total weight approximately 3-3.5 kg);
- fine-fiber beef pulp without bone (preferably from the shoulder blade) – 0.8-1 kg;
- filtered water - about 5 l;
- onion – 2 large heads;
- carrots – 2 medium-sized root vegetables;
- salt - to your taste;
- bay leaves - 3 pcs.;
- allspice and black peppercorns;
- garlic - 0.5-1 head (if desired).
The secret to successfully making beef jelly lies in choosing the right meat for it. Experienced chefs say that in order for the beef jellied meat to harden well, and the jelly in it to be concentrated and transparent, to cook it, you need to use those parts of the meat carcass that contain the greatest amount of cartilage and connective tissue. Thus, beef shanks and tails are optimal for preparing this dish.
Advice. In order for the broth to be rich, aromatic and absolutely transparent, only fresh meat should be used for cooking the jelly. Frozen beef jelly turns out cloudy.
Cooking procedure
1. Wash the meat thoroughly, scrape the surface of the shanks and tail with a knife to remove all adhering debris and small bone fragments. In order for the jelly to be completely transparent, the remaining blood must be removed from the meat. To do this, soak all pieces of beef for 1.5-2 hours in ice water.
2. Rinse the soaked meat again. Place the pulp in the refrigerator for a while, and place the shanks and the tail, cut into 2-3 parts, tightly in a large saucepan and fill them with cold drinking water. Ideally, the liquid level should rise no more than 2-3 fingers above the pieces of meat.
3. Place the pan on the stove and turn on the burner underneath at full power. When the water begins to boil, reduce the flame by half and begin to remove the foam that forms on it from the surface of the broth with a slotted spoon.

You can add carrots, olives or gherkins to the jellied meat for decoration.
5. After the scale stops appearing (usually this takes 10-15 minutes), reduce the flame to low, cover the cooking jelly with a lid and leave it to simmer on the stove at a minimum, barely noticeable boil for 4-4.5 hours.
Important! During the first 5 hours of cooking, do not add salt to the jellied meat, otherwise the meat will turn out tough!
6. From time to time, lift the lid and skim the fat from the broth.
7. 4.5 hours after boiling, place the beef pulp in a saucepan with jellied meat, add heat, wait until the broth boils again, collect the foam from it and again reduce the flame to low.
8. After 2 hours have passed from the moment of placing the meat, place peppercorns and peeled onions and carrots, cut in half lengthwise, into a pan with jelly.
Advice! To give the broth a beautiful golden color, you can first fry the root vegetables until light brown in a frying pan without oil.
9. Salt the jelly to taste for the first time, and check its saltiness after half an hour. Some of the salt will be absorbed by the meat, so most likely the jellied meat will have to be salted.
10. 3-3.5 hours after adding the beef pulp, the jelly will be almost ready. Dip bay leaves into the broth and after 5-10 minutes turn off the burner.
11. As soon as the broth has cooled down a little, start disassembling the jellied meat.
12. Arm yourself with two large forks, remove pieces of meat from the pan one by one with a slotted spoon, place them on a dish scalded with boiling water and, using a knife and forks, remove pieces of meat from the bones and disassemble them into individual thin fibers.
13. Place meat fibers freed from cartilage and bones into pre-sterilized enamel bowls or other suitable containers (regular deep bowls, special molds or metal bowls).
14. Having finished laying out the meat, strain the broth through a scalded fine metal strainer, heat it again to a boil, add salt if necessary, add garlic pressed through a press if desired and pour the prepared hot broth over the meat laid out in the molds.
15. After the jelly has completely cooled at room temperature, put it in the refrigerator. The next morning the jellied meat will be ready.
Jellied pork legs and knuckles
Ingredients:
- meaty knuckle – 1 piece;
- well-processed pork legs (preferably from the market) – 2-3 pcs.
- onion – 2 heads
- carrot – 1 pc.
- laurel leaves – 2-3 pcs.
- black peppercorns, salt and 1/2 head of garlic.
Preparation:
1. Ask the butcher at the market in advance to cut each leg and shank into 2-3 parts.
2. Rinse the meat components thoroughly and scrape the skin on the legs with the back of the knife blade.
3. Soak the pork in cold water for a couple of hours. During this time, change the water once.

4. Completely wash the pieces of shank and legs, place them tightly in a large saucepan and fill with cold drinking water so that its level rises 3-4 cm above the meat.
5. The further technology for cooking pork jellied meat is practically no different from cooking beef jelly. The slight difference is the absence of a second fillet of meat and cooking time. Jellied pork legs are prepared a little faster - 5 hours after the start of boiling, the liquid will need to be salted and vegetables and peppers should be added to the jelly, and after another hour the jellied meat can be removed from the stove.
6. After the broth has cooled slightly, remove parts of the legs and shanks from it, use a knife and fork to remove pieces of meat and pork skin from the bones and place them in bowls or bowls.
7. Carefully strain the broth through a thick metal strainer, heat it over the fire, add chopped garlic and pour into molds.
8. When the jellied meat has hardened well, use a silicone spatula to carefully remove the hardened fat from its surface.
Chicken jellied meat
In order for chicken jellied meat to be tasty and aromatic, and for the jelly in it to be strong, concentrated and transparent, to prepare it you need to take an old domestic chicken with yellowish skin and long legs. Pale pink fleshy carcasses of store-bought broiler chickens are not suitable for these purposes!
Product set:
- domestic chicken - 1 large carcass weighing about 2 kg;
- onion – 1 large head;
- carrots - 1 large root vegetable;
- celery and parsley roots - 1 small root each;
- laurel leaf – 2 pcs;
- black peppercorns - 10 pcs;
- salt;
- water;
- gelatin packet – 20 g.
Cooking procedure
1. Scorch the bird carcass over a gas burner and remove the stumps remaining from the feathers with tweezers.
2. Wash the chicken and cut it into quarters.

3. Place the parts of the carcass in a large saucepan, fill them with filtered drinking water so that its level is 2 fingers higher than the level of the meat pieces.
4. Place the dish with the poultry over medium heat, and after the water boils, reduce the heat to low.
5. Carefully remove all foam from the broth and cook the bird, covered, at a gentle simmer for 4 hours.
6. Now add a carrot cut in half, an onion in the bottom layer of husk, peeled spicy roots and peppercorns into the broth.
7. Salt the broth to taste and cook the chicken for another 1 hour.
8. At the end of the last hour, add bay leaves to the jellied meat and, if necessary, add salt to the broth.
9. Turn off the burner and let the jellied meat cool slightly.
10. Pour gelatin into half a glass of hot boiled water. When it swells well, dilute it with a glass of hot chicken broth.
11. Remove the chicken from the broth, separate the meat from the skin and bones and arrange it in molds.
12. Strain the hot broth through a metal strainer, add the gelatin solution into it and pour the resulting mixture over the chicken meat.
13. Let the jellied meat cool in the air and put it in the refrigerator. After half a day it will harden well and can be served.
Now, knowing all the rules and tricks for preparing homemade jellied meat, you can please your guests and household members with this unusually tasty, original Russian holiday dish.
Cooking jellied meat - video
Winter is ahead. This means jellied meat will appear on the tables - one of the best winter meat snacks. Delicious amber-transparent with the taste of a strong broth - jelly is considered a national Russian dish. And every family, every housewife has their own secret recipes for jellied meat: some prefer thick meaty jellied meat, others like transparent jellied meat with bright accents of carrots and herbs, while the main thing in jellied meat is fresh sugar bone or shanks! Preparing jellied meat will require patience from the cook, but the result is worth it. We will learn how to cook jellied meat correctly, how long to cook jellied meat, what meat to choose for it and how to prepare a transparent, aromatic jelly.
How to cook jellied meat correctly
The golden rule is that jellied meat should harden without adding gelatin and agar-agar. If you follow simple rules: choose the right meat and bones and fill them with the right amount of water and cook for the required time, then your jellied meat will harden on its own. And, if you cook the jellied meat correctly, the broth will remain clear and appetizing!
How to choose meat for jellied meat
In the old days, jellied meat was cooked from those parts of beef or pork carcasses for which there was no other use: legs, heads, tails. However, now we have the opportunity to put any meat in jellied meat, but do not forget that it is the bony-cartilaginous component that is responsible for the hardening of jellied meat. So, in order to properly cook jellied meat, follow the rules:
- for the taste of jellied meat:
- choose the meat that you like best: pork (pork knuckle), beef (beef edge), rabbit, turkey, chicken (old roosters are especially good), and the meat of wild animals will give the jellied meat a unique taste;
- the meat and legs must be fresh, in which case you will get a flavorful broth, and therefore a delicious jellied meat;
- Before pouring, you can add finely chopped garlic to the cooked meat, pepper, mix well and only then put it into molds.
- for freezing jellied meat:
- There shouldn’t be a lot of meat in the jellied meat recipe - follow the proportions: for one part of the legs, take about two parts of the rest of the meat;
- In order for the broth to solidify without gelatin, it is necessary to use legs, shanks or tails; veins, cartilage, skin, and skin also contribute to the solidification of the broth;
- the water should cover the food by about two centimeters;
- cook the jellied meat for at least 6 hours.
- for the beauty of jellied meat:
- jellied meat from beef or lamb legs will be more transparent than jellied pork shanks;
- drain the first water;
- do not let it boil intensely;
- skim off foam;
- Before pouring into molds, strain the broth through 4 - 6 layers of gauze.
How to cook clear jellied meat
Before preparing jellied meat, legs, tails, etc. should be soaked, this will allow you to cook a more transparent broth, because soaking will remove blood clots and other small particles that can turn into rags. So, rinse the meat, scrape the legs, singe them if necessary, and rinse them too. The prepared products should be filled with cold water and left. Drain the water periodically. Usually it is enough to change it 2-3 times to stop blushing. Before preparing jellied meat, the water in which the meat and legs were soaked must be drained.
Some housewives, for greater transparency of the jellied meat, recommend draining the first water, which means: bring the food to a boil and drain the water, rinse the legs and meat again, pour in cold water again, bring to a boil, skim off the foam and simmer over low heat.
Be sure to skim off any foam throughout the cooking time. To ensure that the jellied meat is transparent, do not allow the contents of the pan to boil intensely. If you don't follow these rules, you will end up with cloudy jellied meat.
How much water to pour into jellied meat
An important rule that is often not included in jellied meat recipes is that meat and shanks are poured only with cold water and there should not be too much or too little of it! This is a very important point in preparing jellied meat. During the cooking process, water is no longer added, so initially pour the required amount of water into the pan. Different housewives give different ways to determine the amount of water for jellied meat, remember the simplest one: the water should be about two centimeters above the level of the meat.
How long to cook jellied meat
Recipes for jellied meat clearly say: jellied meat takes a long time to cook! Meat and bones should simmer over low heat, gradually imparting flavor and aroma to the broth. This is the only way you can properly prepare delicious jellied meat - aromatic, rich and perfectly frozen. So, pour cold water over the clean products, bring everything to a boil, remove the foam and reduce the heat to such an extent that your broth gurgles quietly. Don't forget to skim off any foam or grease if you like. It is also recommended to cook jellied meat without a lid.
Important! Cooking time for jellied meat is at least 6-8 hours!
What to put in jellied meat
- onion, peeled from the first layer of husk - two hours before the end of cooking the jellied meat;
- carrots - an hour before the end of cooking the jellied meat;
- peppercorns - half an hour before the end of cooking the jellied meat;
- bay leaf - half an hour before the end of cooking the jellied meat.
How much salt to put in jellied meat
How to salt jellied meat depends on your taste. General recommendations advise salting the jelly no earlier than an hour before it is ready. Many people salt jellied meat after it has been cooked. Moreover, you need to add more salt than you are used to. The broth should become quite salty; some may even find it too salty. This is what will allow it to become a perfectly salt-balanced dish when frozen. Undersalted jellied meat will be tasteless and bland.
How to check if jellied meat is ready
After the cooking time has passed, housewives recommend checking whether the jellied meat has hardened in this way: scoop up a little broth, cool slightly and wet your fingers with it; if your fingers stick together when squeezed, then the broth is strong enough and the jellied meat can be considered ready for pouring.
How to disassemble and pour jellied meat
When the jellied meat is cooked, let it stand for about 20 minutes and proceed to disassembly: separate the meat from the bones and cartilage. The meat is removed from the broth with a slotted spoon. It is removed from the bones and separated from the cartilage and skin. The meat is cut or separated into small pieces with your fingers. It is often recommended to add finely chopped cartilage to the meat, so the jellied meat will be denser. By the way, some housewives recommend adding finely chopped garlic to the meat, pepper, mix well and only then put it into molds. To decorate the jellied meat, you can cut out circles or stars from the carrots that were boiled in the jellied meat; you can also lay out leaves of fresh herbs and olives cut in half. Prepared meat and vegetables should be poured with strained broth. You can stir, or you can leave the meat and jelly in layers.
Freezing of jellied meat
First, the jellied meat is cooled at room temperature. After this you can put it in the refrigerator. Jellied meat cannot be frozen; it will lose its tenderness and softness, and it will also lose its taste.
What to serve jellied meat with
Jellied meat is usually served at the festive table with vodka with horseradish, mustard, mayonnaise, vinegar or beets with horseradish.
Simple jellied meat recipes
Now that you know how to cook jellied meat correctly, how long to cook jellied meat, how to prepare transparent, tasty jellied meat, it’s time to try to do it in practice. Simple jellied meat recipes have been selected for you.
Recipe Triple jellied meat or jellied meat made from three types of meat
1 beef shank2 pork shanks
1 whole chicken
2 carrots
2 onions
2 parsley roots
1 tsp allspice
1 tsp black pepper
3-4 bay leaves
3 cloves garlic
salt
Rinse the meat in cold water and soak overnight. Drain the water. Pour clean cold water over the meat and place over medium heat. Before boiling, skim off the foam and remove it regularly as it appears. After boiling, reduce the heat and cook over low heat at a barely noticeable boil for 8 hours. Do not cover the jellied meat with a lid. If the meat is fatty, remove the fat every hour. After 2-3 hours of cooking, throw peeled carrots, parsley root, and onions into a pan with jellied meat. An hour before the end of cooking the jellied meat, add black and fragrant peppercorns and bay leaves into the broth. After 8 hours of cooking, remove the meat for disassembly, remove and discard the vegetables, add salt to the broth. Break the meat into small pieces and place in the pan. Pour in the strained broth and let cool at room temperature. To harden, place the jellied meat in the refrigerator.
Beef leg jellied recipe
2.2 kg beef leg
3 tablespoons salt
black peppercorns
Bay leaf
Rinse the bottom part of the beef leg, pour boiling water over it and let it boil. Drain the water and rinse again. Pour cold water over the meat and bones again. In this case, the water should completely cover the meat. Bring to a boil over high heat. As soon as the broth boils, skim off the foam, reduce the heat and cook for about 6 hours. Until the meat easily separates from the bone. 20 minutes before the end of cooking, add salt, peppercorns, bay leaf. Remove the finished meat from the broth and separate from the bones. Strain the broth through a sieve, as small bones may be caught. Finely chop the meat, and if there is cartilage and skins boiled to a soft state. Place the cut meat evenly in trays or bowls. On top of the meat, you can add 2-3 slices of boiled carrots to each tray for beauty, as well as a little finely chopped garlic for flavor. Pour in the strained broth, distributing it evenly across all trays. Place trays of jellied meat in the refrigerator to harden.
Recipe for Jellied Pork Legs
1 kg pork feet
2 carrots
2 onions
Black peppercorns
2-3 bay leaves
Salt
Wash and scrape the pork legs, singe them and remove the hooves. Soak for 3-4 hours. Fill the legs with water so that it covers them by 5 cm and put on high heat, bring to a boil. Drain the water and add new water, bring to a boil again, skim off the foam, and cook over low heat. Cook for about 8 hours. An hour and a half before the end of cooking, add peeled carrots and onions in their peels. After another 40 minutes, add pepper and bay leaf. Remove meat and vegetables with a slotted spoon. Vegetables - throw away. Separate the meat from bones and cartilage and chop finely. Place into molds. Strain the broth and pour the meat into the molds. Cool at room temperature, then refrigerate for several hours until set.
Jellied meat recipe in a slow cooker
2 pork feet
2 chicken legs
2.5 liters of water
1 onion
½ head of garlic
Salt
Peppercorns
Wash the legs, clean and soak for 2-3 hours. Chop the chicken into pieces (the leg can be cut into three parts). Peel the onion, put meat and onions, spices and salt into the multicooker bowl, fill with water to the maximum. Set to simmer mode, the longer the better, it is convenient to leave the multicooker overnight. When the jellied meat is cooked, remove the meat, remove it from the bones and cut into small pieces. Add garlic cloves crushed with a knife to the broth. They will sit while we prepare the meat. Taste and add salt if necessary. Place the meat in the molds, filling them half or two-thirds full. Pour in strained broth. Cool at room temperature and then put in the refrigerator to harden.
Previously on the topic:
Hare hunting is one of the most popular in our country. A hare is an excellent trophy that can decorate any hunting table. The main thing is to know how to properly cook a hare. Domestic rabbits are easier to prepare, but with wild...
Fragrant stewed rabbit, spicy baked duck, crispy fried goose... Poultry and animal meat are important products in the human diet. Meat contains many useful substances, vitamins, minerals and much-needed protein for humans....
Lightly salted red fish that melts in your mouth is the most delicate and healthy delicacy. Try making salted red fish at home. We'll tell you the simplest recipe for salting red fish, and explain how to properly salt fish with your...
Dried salted fish is often associated as a beer snack. But dried, dried and smoked fish is not just a tasty snack, but a real storehouse of nutrients! Let's figure out how to salt fish, how to dry fish and how to smoke...
Smoked fish. Delicious. Fragrant. Melts in your mouth. All you need to smoke fish at home or on a fishing trip is a smokehouse and a fire. Let's figure out how to cook smoked fish at home. Let's find out how to smoke fish, what kind of wood...
Delicious aromatic hot crayfish - a delicious delicacy. Imagine a mountain of bright red crayfish, from which fragrant, fragrant steam rises. Did you feel your appetite being stimulated? Let's learn how to cook delicious crayfish, how...
At home, you can salt the caviar of any fish, as long as it is freshly caught. Home-salted caviar is especially good when paired with rye bread. Sandwiches with it will be an excellent addition to your menu. Let's find out how to properly...
Okroshka is the most popular summer dish. Filled with fragrant cool kvass, seasoned with sour cream, sprinkled with chopped aromatic herbs - just what you need in the heat. You shouldn’t immediately pour in the products cut for okroshka, try this...
The long-awaited opening of the 2013 autumn hunting season is approaching. Any hunter will confirm that the opening of a hunt is always a holiday: the first dawn, the elastic whistle of duck wings, the first trophy captured. And then the smell of the fire and cooking...
Thinking about the menu for the New Year's celebration begins long before the long-awaited and, probably, the most magical day of the year. On the eve of the holiday, housewives get on the phone and start calling all their friends and relatives to find out all the secrets of preparing delicious jellied meat. However, often “word of mouth” information threatens to result in an unsuccessful aspic, liquid, cloudy and greasy, thereby spoiling the entire elevated mood.
A similar dish was brought to Russian lands by the French, who at one time were fashionable to hire to teach noble children, and also as excellent cooks, which, by the way, they were. In those years, Napoleonic countrymen had in their cookbooks a recipe for an amazing dish called “galantine”, which translated means “jelly”.
This unknown “beast” was cooked from poultry and game, rabbit, pork or beef, after which the meat was separated from the bones and twisted with the addition of eggs and spices. The resulting pate was diluted with rich broth to the consistency of pancake dough and sent into the cold, where the most delicious product was ultimately obtained.
Arriving in Russia, the French noticed that local servants were fed a similar dish after lavish balls, but its appearance was extremely disgusting. It was nothing more than jelly, which was prepared from the crushed remains of a lordly feast, which could include meat and vegetable products, boiled in broth and chilled.
Taking note of this brew and their signature recipe, European cooks began to experiment with spices and additives, obtaining various versions of quite tasty jelly-like dishes: aspic, jellied meat and brawn.
In order to understand all the questions in more detail and get comprehensive answers to them, we will deal with everything in order.
Question No. 1: what is the difference between jelly and brawn from jellied meat, and jellied meat from aspic?
Often, out of ignorance, all these concepts are lumped together, and many still believe that this is the same dish, just under different names. Such culinary ignorance sometimes leads to an unexpected result in the cooking process, for example, jelly, if a faithful friend with an open heart innocently gave a recipe for the same brawn. In order not to experience the bitterness of disappointment after the tedious boiling of a pork snout for several hours, let's put everything in its place and explain who is who.
Jellied
This is a lighter version of jellied meat. It is usually cooked from lean varieties of meat: chicken, rabbit, veal, tongue, as well as fish. Gelatin is often added to the broth to further solidify it.
In the design of the dish, the name speaks for itself: meat slices, quite large, are placed on the bottom of the container, decorated with vegetables and other additives and filled with light broth, after which the whole thing is sent into the cold to harden.

Seltz
This is pork or beef meat boiled in broth under pressure, and often for its preparation they take a cleaned head, with the addition of spices. After a few hours, the meat pieces are separated from the bones, mixed with a very rich broth and poured into a jar or natural casing.

Jelly
This is the closest relative of jellied meat and in most cases both of these terms are used as synonyms, however, these “brothers” also have their own differences and nuances in preparation.
Firstly, this version of the jelly-like snack takes much longer to cook, has a darker color and a somewhat soft consistency. In addition, jelly does not accept spices, with the exception of garlic.

What is jellied meat, be it made from beef or pork, how long does it take to cook and harden with and without gelatin, as well as how to cook it correctly to make the broth clear, and many other questions we will examine more carefully. And then in the center of the New Year's table we will proudly stand the most ideal jelly-like meat dish.
Question No. 2: in which pan should I cook jellied meat?
If theater begins with a hanger, then any culinary “performance” should start with the choice of optimal utensils. As for jellied meat, the question here, of course, is quite large-scale, since this dish takes a long time to prepare, it is usually made in large quantities at once, so this problem must be approached with full responsibility.
Of course, you won’t be able to get away with a 2-3 liter container, since for the broth we usually take stems and oils, and these elements are quite large, and, on top of everything else, they still need to be completely filled with water. Therefore, when choosing containers, give preference to a 5 or even 7 liter pan.
If we have figured out the volumes, now we need to figure out what material is best to choose a vessel from. Today, the assortment of these utensils literally eclipses not only the eye, but also the mind, since determining the best saucepan is, oh, how difficult it is.
Cast iron cauldrons
In general, many housewives advise choosing cast iron cauldrons for cooking jellied meat. This material has the excellent property of holding heat evenly over the entire area of the vessel. Therefore, our broth will heat up not only from below, but also from all sides.

Enameled pans
Enameled saucepans, which are famous for their colorful appearance, have one important advantage: there is no place for germs in such dishes. However, such a container is suitable only for soups, compotes and other liquid foods.
To prepare the jelly, we stew more and more meat, and for a long time, and our fillet simply threatens to burn. And all because such dishes heat up unevenly, and the main heat comes from below from the fire. So we reject such a tank, it does not suit us.

Steel pan
A steel pan is the most popular among housewives. However, this dish has its drawbacks. For example, the low thermal conductivity of this material increases the cooking time several times, and if you remember that jellied meat already takes 1/3 of a day to cook, then this option is simply not appropriate in our case.
However, today manufacturers have solved this problem by strengthening the construction of the pans with a multi-layer bottom and equipping the walls with a copper, bronze or aluminum layer. Thanks to this innovation, such containers are now in no way inferior to cast iron in their uniform heating. So modern steel containers will do an excellent job of cooking jellied meat.

Aluminum pans
Aluminum pans are an excellent tool for express cooking, since the water in them boils instantly, but they are absolutely not suitable for cooking jelly-like meat dishes.
This is explained by the fact that aluminum tends to enter into chemical reactions with salt, acid and alkali, which will affect the taste characteristics of the dish.
In addition, prolonged cooking in such a container threatens to endow the food with toxins, and the food will mercilessly burn in such a container. This option is clearly not for jellied meat.
Ceramic and glass pan
Ceramic and glass containers for cooking jellied meat are just what the doctor ordered. There is nothing better than this type of pan. Despite the rather low thermal conductivity, this material can retain heat for a long time; food in such a container will be cooked as gently as possible, heating evenly, which is especially important for our product.

Pressure cooker or multicooker
Another great helper in preparing jellied meat is a pressure cooker or multicooker. . In these automatic containers with a setting program, you can also cook a wonderful rich broth.

Question No. 3: what is the best way to cook jellied meat?
This question is probably becoming one of the controversial ones, since each family has trump recipes up its “sleeves” using one or another type of meat.
However, for some reason, pork is most often chosen for the broth. This kind of broth “seizes” better, and the jellied meat from it turns out to be quite strong.
But... there are some pitfalls here. The pork broth turns out mostly cloudy and greasy, which threatens to ruin the entire festive appearance of the finished dish.

For those who prefer crystal clear meat jelly, which is in no way inferior in the quality of hardening, we advise you to pay special attention to beef or turkey.
For the strength of the broth and to guarantee excellent hardening of jellied meat without gelatin, you need to choose bone and cartilaginous pieces: legs, shanks, tails and ears, large oils, head and naturally meat, but not fatty meat, since fat is the worst enemy of jellied meat, preventing it will take on a gelatinous consistency.
Chicken jellied meat also plays a significant role in all this festive splendor, but in this case it is better to take more bird legs, necks and heads, and also, if possible, cook the broth with rooster meat. This comrade still has more gelling substances than his girlfriends. In addition, game jelly freezes well, so wood ducks and partridges also have a place in a huge pan.
Question No. 4: How many hours does it take to cook jellied meat?
On the night of December 29-30, magic happens in all the kitchens of the country: everyone is asleep, and only “life” continues to boil in a huge pan on the stove - this is jellied meat being cooked.
This method of overnight cooking has been ingrained in the hearts of housewives for decades, during which their mothers, and before them, their grandmothers, cooked this way. However, a reasonable question arises: how long should jellied meat be cooked?
Even the most experienced chef in the world will not be able to answer this riddle, since the time regime directly depends on the type of meat that was chosen for this important mission, as well as on the type of unit in which the whole process takes place. Therefore, in order to still provide comprehensive information, we will consider all possible options.
How long to cook chicken jellied meat?
For those who are fans of white meat and decided to prepare a jelly-like chicken snack, we hasten to convey the happy news. Your dish will cook the fastest – 3 hours, according to experts.
However, housewives, as independent experts, but whose opinions are very important, still assure that due to the small number of gelling components in birds, it should take at least 5 hours to cook an excellent chicken jelly, and in order for the jelly to turn out great, it is better to cook a rooster along with the chickens .

How long does it take to cook pork jellied meat?
Most chefs give greater preference to this dish made from pork knuckle. They say it freezes better and tastes better.
But for every jellied meat, there is a fellow, with his own taste preferences and gastronomic wishes. But those who still choose to cook the “shaky” snack on legs need to be patient, since the brew will take 6-7 hours to prepare.
How long does it take to cook beef jellied meat?
In principle, beef broth is prepared no more and no less than pork, it will take the same 7 hours to cook.
In general, for any jellied meat, in addition to time, there is a readiness indicator. When the meat begins to separate from the bones on its own, the process can be considered almost complete.
How long does it take to cook jellied meat in a pressure cooker?
The kitchens of many home cooks today are more reminiscent of a space station, filled with strange appliances with lights and buttons. A pressure cooker today is one of the most popular units that can greatly facilitate cooking, saving a lot of time and nutrients in the prepared product.
So, you can cook meat jelly in this miracle pan under high pressure much faster than the usual old-fashioned way. Pork and beef jellied meat will take no more than 3 hours, chicken jellied meat – 1-1.5 hours.
How long should you cook jellied meat in a slow cooker?
However, now an even faster kitchen assistant has appeared, a hybrid of a pressure cooker and a multicooker. If you often wonder how to quickly cook jellied meat, then this device is simply vital for you, because only with its help you can actually cook excellent jellied meat in a short time, where our dish will reach the desired condition in a matter of 1.5 - 2 hours in the "" mode. meat".
In this smart machine, it will take much longer to boil meat and broth than its predecessor. Still, you will have to wait a tedious 5-6 hours in the “stewing” program, and this time mode applies to all types of meat products, be it poultry or crocodile.
Question No. 5: when should you salt jellied meat when cooking?
Salting the broth is one of the most important secrets of preparing the most delicious jellied meat. Season the jellied meat with salt literally half an hour to an hour before the end of cooking. Previously, this should not be done due to the fact that the liquid evaporates during the simmering process, and as a result we can end up with an inedible, over-salted dish.
In order for the jelly to be the most delicious after it hardens, you need to slightly salt the hot broth, then after cooling we will get an ideal product with excellent taste.

Question No. 6: how to properly cook jellied meat to make it transparent?
Very often housewives make mistakes when cooking jelly in the form of a cloudy broth. And all because the production technology was violated during the preparation process. To avoid the “cloudy” shame in the future and achieve mirror-like purity of the jelly, take note of the following rules:

How to lighten cloudy jellied meat
However, sometimes force majeure situations occur when, even with strict adherence to all the rules, the prepared dish still suffers an evil fate in the form of dregs. There is no place for despair in the kitchen, drive it away, away and away. Now we will tell you how to lighten cloudy jellied meat. For this we need fresh eggs, or rather their whites, at the rate of 1 white per 1 liter of broth.
- We remove all the meat from the broth and use a strainer to catch the flakes;
- We need to beat the egg white mass to a stable foam and carefully add it to the meat broth, so that the whites are distributed evenly throughout the entire volume of the liquid;
- Now remove the pan from the heat and pass the broth through a fine mesh, which can be chiffon fabric or gauze folded several times. Our goal is to clean the liquid as much as possible from unnecessary impurities;
- The whites absorb excess turbidity, and at the end we get a light and beautiful jellied meat.
If desired, at the end of cooking you can tint the broth with turmeric or saffron. These spices will give it a beautiful golden hue.
Question No. 7: how to remove fat from jellied meat?
After an endlessly long process of cooking jellied meat, we can find a rather impressive oily layer on the surface of the sticky broth, which we must definitely get rid of so that our dish does not turn out to be overly greasy.

Question No. 8: why doesn’t the jellied meat freeze and what can I do to make it freeze?
Very often, inexperienced and sometimes even seasoned housewives experience an unexpected and far from positive result from all their jellied activities. It seems like you do everything strictly according to the recipe, following all the technology and cooking time, salting and skimming off the fat on time, bleaching and filtering the broth.
Having abandoned your family for the whole day, having spent a good half of the day preparing thankless jelly, you end up faced with the problem that the jelly simply did not freeze or did it poorly.
A new round of questions immediately arises: why did this happen? How can I fix this now? And what, exactly, should we do?
- The first thing that can affect this snack behavior is excess liquid. If during the cooking process the broth was repeatedly added and in the end it turned out to be liquid and not sticky, then this is where the problem lies. Ideally, the proportions of water and meat should be 2/1, then your dish will turn out great.
- The second factor for failure may be insufficient cooking time. If you cooked it a little, then the liquid simply did not have time to draw out all the “juices” from the seeds and cartilage.
To correct this problem, you need to heat the jellied meat again and add gelatin diluted in cold water to the liquid and then decorate the finished brew and pour it into molds.

The jellied meat should harden for the same amount of time as it was cooked, namely 6-7 hours. So if after just an hour or two you raised the alarm that the jelly has not set and the liquid is not gelling, then your nerves are simply losing steam from hard work. Sit down, relax and after a while you will be delighted with a wonderful New Year's surprise.
Question No. 10: How long does jellied meat last in the refrigerator?
Jellied meat is such a delicious thing that it is eaten much faster than it is cooked. However, due to our mentality, we always cook a lot so that there is enough for our family, guests, and neighbors. And it doesn’t matter that they all prepared everything on the same scale.
That is why a gelatinous snack can often sit in the refrigerator for several days, waiting for its finest hour. However, this delicacy also has its own expiration date, which expires 5 days after its preparation.
But there is an opportunity to extend the aspic existence for a couple of days. You just need to put the appetizer in a pan, heat it, simmer slightly over low heat and pour it into the molds again. Voila, a new life for the jelly is guaranteed.
Using our secrets for preparing delicious jellied meat, you can achieve excellent results in the culinary field, even if this is your first time thinking about making a gelatinous snack. And if you use your wild imagination and decorate this meat splendor to your liking, then believe me, this dish will become the crowning dish at your holiday.
