What is the best T-shirt to draw on? Master class "draw on a T-shirt"
Guys, every day I answer my friends in "classmates" and "contacts" with what colors I draw on clothes, and where to get them and is it not difficult. I decided that it is already easier to write once, and give everyone a link.
How to use textile paints
It doesn't matter which of these paints you use, the technology must be followed:
- Before drawing, the product must be washed to remove the factory impregnation of the fabric.
- Put something under the fabric, the paint seeps through. I use a flat A4 kitchen mat for hot, it is easy to wash afterwards.
- If you want the colors of the layers to mix - apply the next layer without waiting for the previous one to dry. If you want a clear shade on the previous layer, wait 20 minutes.
- Fix the drawing after it is completely dry, this is 6-8 hours. Iron each element for at least 3 minutes without steam in the "Cotton" mode through the fabric or from the inside out.
- Wash by hand or in the machine on a delicate cycle at 40 degrees, iron inside out.
- Paints are afraid of frost, because. water base. You will buy - do not freeze on the street. It is better not to order by mail yet, wait for heat.
Overview of textile paints
I only write about the colors that I have. The choice in our city is not at all dense. What is:
From left to right:
Jacquard Tetxil.
Description from the manufacturer:
A krylovy paint for natural and synthetic fabrics Jacquard (USA) Yellow. Jar 60 ml. Approximate consumption: 60 ml per 1.0-1.5 m2. For light fabrics. Ready to use, does not cause tissue hardening. Permanent coloration. With gentle washing and dry cleaning does not fade. Lightfast. How to use: Shake the bottle well. Apply to product. Let dry on the fabric, then heat-fix by ironing on the reverse side for 30 seconds. at the temperature of the respective tissue.
My opinion:
Big banks. The thickest and best opaque colors in my arsenal. One layer on a light fabric is more than enough. On the dark, they give good coverage in 2-3 applications. The advantage of these paints is good covering ability. White can prime a dark fabric. The downside is the formation of lumps and the need to dilute them well before application. The white one I came across is so thick that you can only draw it by diluting it with water by a third (I do this in the palette). This takes time, as you need to stir it well and evenly, grind the lumps. Ocher is more liquid and homogeneous. It’s a pity that you can’t immediately check the quality of the paint in the store (the cans are packed). The paint is very dense, if you apply 2-3 layers, the picture will be quite hard to the touch, so they wrote about the hardening of the fabric in vain.
The price is 120 rubles per jar, I bought it in an art store on the second floor of Pyaterochka, Yesenin Street.
Available in the online store http://www.arttrafaret.ru/
Usage example:
Usage example:
Swelling contour on Marabu fabric "FUN LINER MAGIC"
Description from the manufacturer :
Volumetric contours for fabric, cardboard, stone, clay, paper, etc. Application: Clean the surface, apply the contour. The drying time of the contours is about 6 hours, however, lines and images with a thickness of 5 mm or more can dry up to 2 days. On hard surfaces, the contours are fixed with a hair dryer for 10-60 seconds. On fabrics (cotton, silk), the contours are fixed with an iron through a thin fabric at a temperature of 150 degrees ("cotton") for 1-3 minutes. Gentle wash at 40 degrees recommended.
My opinion:
I had a bad experience with this tool. Tried to draw a dragon for them. The process itself is laborious, since the paint is thick and the can must be squeezed with your fingers quite strongly. Hands get tired quickly. It dries for 8 hours. At first it looks beautiful. You iron it through the fabric - it swells up funny, becomes thick and matte. Good too. But after the first wash, it began to fall off in pieces, crumble. Washed in the machine on a delicate cycle, 30 degrees. The entire T-shirt was covered in crumbs. I was upset, I decided to wash off the entire contour even then, since it looked terrible. It wasn't here! Part of the contour (upper part) was easily torn off, the lower one was stone-bitten into the fabric. Rubbed, washed several times, to no avail. The t-shirt was damaged. Saved with a thick layer of primer (Jacquard paint), and subsequent drawing. You can still feel this contour to the touch. Nasty, nasty, nasty! Perhaps I will use it on cardboard or other surfaces that do not need to be washed and washed.
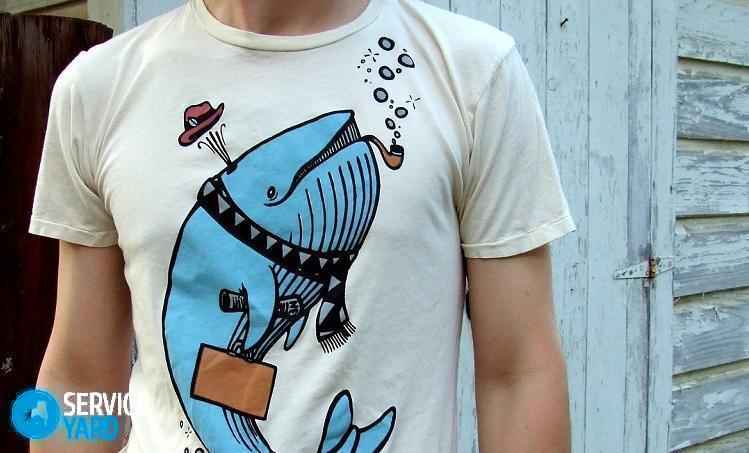
Here's what came out of my t-shirt in the end:
Right herethere is an interesting master class, after reading which, I bought this tool. In vain.
Price 600 r for a set of 6 flowers.
Summer is the best time to forget about boring boring sweaters and dress up in bright, colorful clothes. Torn shorts, T-shirts with funny inscriptions, funny accessories look not only appropriate in summer, but perfect. You can try to reveal your creative abilities, bring to life the most daring ideas and make an outfit out of an ordinary thing that will delight everyone around you. To do this, you can cut stylish holes in it, make a fringe or draw pictures on T-shirts with your own hands. That's just about painting with paints in this article and will be discussed.
T-shirt painting - materials for work
In order to paint a piece of clothing, you will need the following:
- A plain cotton T-shirt (a synthetic product will not work, because it stretches and the pattern can be deformed. It is better, of course, to use a new thing, but you can also practice on old, unnecessary clothes).
- Brushes with natural bristles (synthetic ones can leave ugly stains on the fabric).
- Acrylic paints for painting on fabric (for example, you can use sets from Marabu or Decola - they can be purchased at specialized art stores).
- Simple pencil.
- Black marker for painting on fabric.
- Stationery clips for papers.
- Clothespins.
- Thick cardboard or board for stretching the fabric.
- Palette for mixing paints (you can use a disposable plastic plate.
Workshop on painting clothes
In our example, we will be coloring a white nautical-themed t-shirt with an anchor. In order to make drawings on T-shirts with your own hands, you must act in the following sequence:
- Wash and iron the garment carefully.
- Place a cardboard or board inside the T-shirt so that your design does not print on the back. Secure it carefully with paper clips and clothespins so that there are no wrinkles and the fabric does not stretch.
- Choose any drawing that you have planned to apply. Gently apply it to the fabric with a simple pencil (you can immediately draw a sketch on the fabric or use a stencil).
- Start coloring from the background. Color the stripes of the background blue, making them slightly sloppy on purpose. Leave the white stripes unpainted.
Important! Periodically lift the material slightly and check that it does not stick to the board or cardboard.
- Paint the anchor with gray paint, adding shades to your liking to create volume.
- Draw a ribbon on the anchor - we have it in light yellow, also adding volume with the help of dark shades.
- Leave the product to dry completely. To speed up the process, you can use a hair dryer.
- After the paint has dried, paint the outlines of the ribbon and anchor with black paint. To do this, you can use a special marker or a thin brush and black paint. You can also use contour paints, as they have convenient tubes that allow you to draw thin, neat lines.
- Wait for it to dry completely, and then iron the pattern with an iron - this way you can fix the pattern on the fabric.
Important! Since it is impossible to iron on the picture itself, this must be done through a thin cloth or simply from the wrong side. Do not use steam when doing this, as the paint may leak. You need to iron for about 2-3 minutes.
Painting clothes on a stencil
An even easier way to create designs on T-shirts with your own hands is to paint using stencils. This does not even require drawing skills - just a little accuracy and inspiration.
For stencil painting, you will need the following:
- Natural plain t-shirt.
- Foam rollers.
- Acrylic paints for painting on fabric.
- Cardboard or board for the substrate.
- Stencils (you can pick up any pictures and cut them out, for example, from a stationery plastic folder).
- Masking tape.
- Stationery clips or clothespins.
- Plastic bowl for mixing paints.
Painting master class using stencils:
- Wash the item and iron it well.
- Place a cardboard or board inside the T-shirt, carefully secure the fabric with clothespins or stationery clips.
- Choose a location for the pattern and secure the stencils using masking tape.
- Mix the paint on a plate, apply it to the foam roller.
Important! In no case do not add water to the paint, because it will become too liquid and will flow under the stencil. If you want to achieve a lighter shade, then you need to add white paint.
- Roll paint over the stencils.
- Without waiting for the paint to dry, carefully remove the stencils and leave the product for about 15 hours.
- After the time has elapsed, iron the product with an iron without steam to fix the pattern from the wrong side.
Important! With this technique, you can quickly decorate children's clothes, giving it brightness and personality.
You will need
- - markers
- - acrylic paints and contours
- - t-shirt
- - simple pencil
- - stencils
- - paint for batik
Instruction
Abstraction. Roll the T-shirt into a knot, roll, or rope. Who likes it better. Soak it in paint designed for batik. It can be purchased at stationery or art supply stores. When you straighten the T-shirt, beautiful symmetrical patterns will be visible all over its surface. T-shirt can be tied with a cord or ribbon, while the patterns will be more interesting.
A drawing drawn with outlines or markers. With the help of a contour or a marker, you can draw a clear drawing. For this, there are special markers designed for light and dark fabrics.
Acrylic outlines are small tubes of paint that can be used to draw on fabric. The only thing that contours give way to markers is that you should press evenly on the tube to make the drawing look neater.
Stretch the t-shirt over a flat surface before applying the design. Select a sketch and transfer the design to a T-shirt using a simple pencil. Now you should outline it. If you want to color the drawing, then use acrylic paints.
Stencil. For lovers of pop art, stencils are perfect. Make a sketch on cardboard. The drawing can be anything - it is entirely your imagination. Remember, the drawing should be solid, and not consist of pieces.
Lay the resulting stencil on a T-shirt and paint over the entire sheet, then remove it.
Costume imitation. A very interesting approach to the design of a T-shirt would be a copy of the shirt of a movie or comic book hero. For example, on a dark T-shirt, paint a tie, buttons, and pockets with white paint.
The design is all over the t-shirt. A rather interesting solution would be a pattern stretching across the entire T-shirt. It doesn't have to be done on one side. For example, you can draw her paws on the back, and the muzzle in front, the tail can be drawn down the hem of the T-shirt.
Sources:
Any plain t-shirt can be a canvas for your experiments. Armed with one jar of paint, you can paint over a T-shirt completely, create abstract patterns on the fabric or apply graphic symbols. To make the most ordinary thing unique, use several fabric painting techniques.
You will need
- - t-shirt;
- - paint on fabric;
- - brush;
- - threads;
- - reserve for batik;
- - cardboard;
- - scissors.
Instruction
If you want to make a colorful canvas without clear boundaries with smooth color transitions, use the free painting technique. Moisten from a spray bottle t-shirt, apply several shades alternately with wide strokes of the brush and let them spread over the surface.
To add a more defined shape to the design and limit the spread of color, try the technique of hot or cold batik. In the first case, those parts of the fabric that should remain light, unpainted, are impregnated with hot wax (using a brush), in the second, fragments of the pattern are outlined with a special reserve that will not let the paint go beyond its borders. Apply the drawing, referring to the sketch and moving from lighter to darker shades.
A painting made in one of the above ways can be supplemented with a three-dimensional contour - it performs only a decorative function and does not replace a reserve.
There are fabric pigments that dissolve in a large amount of water and are originally designed to uniformly color the entire thing. To achieve a more unexpected and interesting effect, make a few “tucks”, tie them with threads, put the T-shirt in a bath or basin and fill it with paint diluted (according to the instructions) on top. Without waiting for the fabric to get wet through, lay it on a dry, clean surface and let it dry (you can dry it with a hair dryer). After that, untie the knots. In these places, the paint also forms voids, which result in an unusual pattern.
Helpful advice
Natural fabrics hold paint better, but recently many compositions have been produced that are also suitable for synthetics - look for information about this on the packaging. It should also say about the method of fixing the paint. As a rule, it is fixed by ironing the pattern from the wrong side.
Sources:
- how to paint a shirt
Each of us strives to be bright and individual, different from others both in manifestations of character, and in such a seemingly completely ordinary life component as clothing. Interesting creative ideas have long been revered in society, you can’t surprise anyone with clothes bought in a store, but if you appear among friends in a non-standard T-shirt with an equally original pattern, most likely, more than one person will overcome you with questions about how to color it yourself t-shirt.

You will need
- - t-shirt;
- - cardboard;
- - acrylic paints;
- - brush;
- - felt-tip pens for fabric;
- - fabric spray
- - a stencil with a drawing blank.
Instruction
Wash the prepared t-shirt. This applies to previously worn items, and recently purchased. In the manufacture, special impregnations are often used, which subsequently prevent you from applying the paint evenly and prevent it from drying without streaks. After the T-shirt has been washed and dried, iron it for ease of use. If you chose color t-shirt, then check in advance the effect of paint on the fabric - it may turn out that the chemical reaction accompanying this process will color t-shirt Not exactly the color you planned.
Place cardboard between two layers: back and front. This is necessary so that the paint does not seep to the other side and spoil the future masterpiece. Wrap the top of the cardboard with foil. Your T-shirt should be as if stretched over cardboard - only then will comfort for work be ensured, and the drawing will fall on t-shirt smooth.
Get your table ready for work. Cover it with newspaper or an unnecessary tablecloth. For convenience, you can attach t-shirt with cardboard tape to the table.
Start painting on a T-shirt. If you are not an artist, but more or less well-versed in these skills, apply the drawing yourself with special means: acrylic paints, fabric sprays or. You can buy all this in specialized stores or art salons. If you are not sure of your artistic skill, use a prepared stencil for this purpose. If desired, apply a drawing with a dampened sponge, a handprint or objects. Your imagination can be limitless. Remember that it is very convenient to circle all the drawn elements with felt-tip pens for fabric - the outlines of the picture will become clear, bright and not blurry.
leave painted t-shirt for 24 hours (the pattern on the fabric should dry well) and only then remove the cardboard. If you want to have a design on the back, repeat all the steps, turning t-shirt to the other side.
In the event that a creative streak does not allow you to wear consumer goods and you want to decorate a T-shirt with a print of your own authorship, you can take your time visiting a photo salon. It is much more interesting to paint a T-shirt with acrylic paints yourself.

Instruction
Acrylic for such works is the best option. It penetrates well into the fabric, retains its properties for a long time, has a huge color palette, and besides, it has many effects. There is glow-in-the-dark acrylic, pearlescent paints and paints with a matte effect, using some more materials, you can achieve an interesting effect of cracking the top layer of paint while keeping the bottom, contrasting, intact. When buying acrylic, you need to pay attention to what fabric it is intended for and choose the one that matches the composition of the T-shirt. You will need several brushes depending on the complexity of the drawing. It is best to take brushes with synthetic bristles - they shed less and it is also easier to wash off the paint from them.
After the paints, brushes, drawing and T-shirt are selected, you can start the process of painting. It is better to lay a layer of cardboard or newspapers between the front and back of the T-shirt; it is much easier to fix the fabric on cardboard. It is not necessary to fix the fabric, but it is desirable, since in the process of drawing it will otherwise begin to fidget and the pattern may be displaced. It is most convenient to transfer the drawing with a soft simple pencil, and then color it.
In the event that during the process of coloring a drop fell in the wrong place, do not be upset. Now it is almost impossible to remove this stain without affecting the main drawing, but you can always show your imagination and color the damaged place so that a random drop seems to be an element of the drawing.
Often acrylic paints are too thick, which makes it difficult to work with them. You can even dilute acrylic with water if there is no other way. But this will reduce the quality of the paint and subsequently it will be washed off the T-shirt faster. It is best to use thinner for acrylic paints, it is important that it is of the same brand as the paints. The layer of paint on the fabric must be uniform and not thick, otherwise it may not be fixed. It is always better to do 2-3 thin coats than one thick coat, that's what thinner is for. The better the paint saturates the fabric, the better and more durable the pattern will be. When mixing paints, it is important to do it as quickly as possible, so the colors will be brighter.
Currently, T-shirts and T-shirts with various patterns and prints are very popular. Among all this variety, you can choose something to your taste. However, not many people think that the original T-shirt can be made independently with minimal effort and financial costs.
What will it take to create this new wardrobe item?
1. T-shirt. It is best to take a cotton product, since it is on such a fabric that the pattern is clearer and brighter and it lasts longer than on other matter.
2. Permanent marker. These markers are easy to draw on the fabric (however, as well as on any other surface). They are not washed off with water and dry very quickly. Moreover, one marker can be used for a very long time. One downside is the strong smell. Therefore, when using a marker, it is necessary to ventilate the room.
Permanent marker can be purchased at any office or hardware store. The choice of flowers there is great, and the price is low (within 130 rubles).
To draw on a T-shirt, you need to choose a contrasting color for it. In this case, we have a gold-colored marker for a black t-shirt.
3. Drawing template. With the help of it, paint will be applied to the T-shirt. There are a large number of templates on the Internet, so everyone can choose a pattern to their liking. In this version, we have a drawing of a palm with a heart.
4. Scissors and stationery knife. These tools are needed for cutting parts.
5. Cardboard. A small sheet of cardboard or an unnecessary cardboard box lid is useful so that when you apply the design, it will not be printed on the other side of the T-shirt.
6. Scotch. With it, we will fix the pattern pattern on the fabric.

The process of creating a pattern on a T-shirt.
First we need a drawing template. With the help of scissors, we begin to cut out the white details.

When cutting small parts, it is better to use a clerical knife.

After we cut out all the details according to the template, we should get the following picture:


After the cardboard is in the right place, we put the template on it and fix it with tape. It is necessary to ensure that the fabric under the template does not bulge, otherwise the pattern may be distorted. In addition, it will be very inconvenient to constantly correct the fabric during the dyeing process. It is necessary to glue the adhesive tape as firmly as possible so that the template does not move out of place.

After all the actions done, we begin to paint over empty spaces in the template with a marker. It is more convenient to start painting from the left side (the opposite side of the working hand), so as not to get your hand dirty and not to smear the drawing.
T-shirts with original inscriptions have always been popular, but it is not always possible to find what you want on sale, and not all localities have companies that make inscriptions or drawings on T-shirts. Of course, you can order such a service on the Internet, but we are not looking for easy ways and we will do the T-shirt painting with our own hands.
Put an inscription or drawing on a T-shirt at home can be done in several ways:
- With a home printer. Sold special transfer paper for printing on inkjet and laser printers. The image is simply printed on such paper and transferred to clothes with the help of an iron. In this way, you can apply not only inscriptions on a T-shirt, but also full-color photographs. Of the minuses - the image will quickly peel off after 10-15 washes.
- Painting with acrylic paints or fabric markers. About this way of painting a T-shirt and there will be our small master class.
Fabric paints are available at many craft stores and are inexpensive. They come in 2 types: just for fabric and for batik (silk).
I have never used batik paints, but I bought a few jars for comparison. They differ in that the paints on the fabric are thick and lie on top of the fabric like all acrylic paints, and for batik they are liquid like water, are absorbed into the fabric and are not felt on it when touched, but are almost invisible on dense fabrics. And they spread a lot and for their use you need to use special contours (sold in the same place as paints). As far as I understand, batik paints are used only for painting silk (it is written on the bank).
For the design on the T-shirt, I used acrylic paints on fabric.

First you need to come up with an inscription and its design. Since the experiment was carried out on a children's T-shirt and especially for this article, the inscription was chosen to be universal: "I love everyone."

You can draw right away without a stencil, but I'm not very good at drawing by hand, I had to do it.
How to make a stencil? To do this, print out an image of the desired size using a printer on thick paper (preferably photo paper) and cut it out.


It is better to cut a stencil with a clerical or mounting knife, or a scalpel. Pay attention to how the letters are cut out: the holes must not be cut completely, so that the inner parts of the letters do not fall off.


Before painting, the T-shirt needs to be ironed, I was too lazy to do this, and it was not very convenient to draw. NECESSARILY under the top layer of the T-shirt place paper or film so that the paint does not smear the other side. For applying the paint, I used a regular artificial brush.

After the stencil drawing is painted over, remove the stencil and paint over the remaining places on the letters that were not cut out. You also need to correct the drawing, if somewhere it turned out crooked.


When finished with the painting, leave the T-shirt to dry for 24 hours (according to the instructions, I waited a little less). When the paint is completely dry, iron the design through a thin cloth for 5 minutes to fix the paint. After ironing, the T-shirt can be safely washed at a temperature of 30-40 degrees and you are not afraid that the paint will come off. The drawing lasts long enough.


