Drawings of a booth for an average dog. Do-it-yourself reliable dog house: dimensions and project drawing
Life in a country house is unthinkable without a dog. A faithful friend and reliable security guard will warn you about the arrival of guests, drive away strangers, and keep you company on a walk. But the pet must live separately. Having your own house will allow the animal to feel free; there will be no hair or dirt from its paws in the house.
What kind of booth does a dog need to make the animal comfortable and comfortable? Is it worth buying it, or can you make a dog house with your own hands?
The easiest way to have a beautiful front lawn
You've certainly seen the perfect lawn in a movie, on an alley, or perhaps on your neighbor's lawn. Those who have ever tried to grow a green area on their site will no doubt say that it is a huge amount of work. The lawn requires careful planting, care, fertilization, and watering. However, only inexperienced gardeners think this way; professionals have long known about the innovative product - liquid lawn AquaGrazz.
From time immemorial, man's faithful friends lived in simple wooden boxes made from scrap materials. Dog grooming is a whole industry these days. They sew clothes for the dogs, do their hair, the animals wear shoes, and go to special schools. Outdoor houses for pets have not escaped fashion either. Some owners build mansions on their plots that resemble cottages or castles. But the dog does not need such luxury.
A kennel is a simple building with a pitched or gable roof and a room inside for sleeping. If the roof is gable, then an attic is formed above the sleeping area, which is used for care items and toys. The single-slope option is preferable if the dog likes to lie on the booth and see all the surroundings and watch people. A straight roof cannot be made; a slope is necessary to ensure that rainwater flows to the ground without penetrating into the interior. The slope must be chosen so that there are no problems with snow in winter.

Often there are booths with two rooms: the innermost one is the bedroom, and located at the entrance there is a vestibule that protects the inside from wind and cold. Some houses are equipped with a terrace, which the dog, in general, does not need, but looks attractive. The animal can take refuge there from the midday heat. A type of terrace is an aviary. A vicious dog or several dogs are housed in a kennel set inside a chain-link shed.
The animal sees visitors, has room to move and play, and at the same time does not pose a threat to visitors. The enclosure should be spacious and located so that the dog can walk in the sun or hide in the shade. If there are several animals in the enclosure, they should have enough space for a fun romp. The main thing is that you need a strong floor raised above the ground. It will protect the animals from moisture and prevent them from digging into the wall and going outside.
There are also houses designed for installation in an apartment. They are a sleeping place, limited on 3 sides and at the top by walls and a ceiling. Often the walls of such structures are soft.

Wherever the dog house is installed, no matter how it looks, the animal should like it. Otherwise the dog will not live in it. Of course, a locked enclosure will leave him no choice, but it will be more and more difficult to drive the animal there each time.
A home booth is made of cardboard or plywood covered with soft fabric; an outdoor structure should be more solid. The houses are made of wood or brick. Metal buildings are not suitable: they heat up in the sun in summer and freeze in winter. Typically, a dog house is insulated and has a floor that can be washed.
The house is raised above the ground so that rain and melt water do not fall into it. Insulation must be safe for the animal. For this reason, glass wool is not used; mineral wool, sawdust or polystyrene foam are used for insulation. Glass wool can injure an animal's eyes, enter the respiratory tract and cause serious inflammation.
Of course, it’s easier to buy a kennel. But the best solution would be a do-it-yourself booth.

Size calculation
The dog needs to feel comfortable, otherwise it will be difficult to force it to live in a new home. Comfort depends on the size of the home. A booth for a small dog needs to be small so that the animal can warm it with its warmth. A large dog should fit easily in the kennel and be able to toss and turn. When determining the size of a doghouse, it is necessary to take into account whether a house is being built for an adult dog, or whether a puppy will grow up there. The calculation is made according to the following scheme:

When planning to make a dog house with your own hands, drawings are necessary. Having calculated the required dimensions, you need to draw the future building. Based on the drawings, they determine how much material is required.
Where to place it?
The question is important: the dog should not only feel comfortable in the new home, but also be able to monitor the territory of the site. The kennel is a kind of security post. To protect the house, the structure is located near the entrance. The dog should be able to see the gate, gate and front door from its position.
When placing a kennel on a site, you need to take into account where the wind predominantly blows from. The direction should not coincide with the hole so that the dog house is not blown out.
The building should be placed in a bright place, but the dog should be able to hide in the shade in the heat. Therefore, the roof should not be made of metal.
It is necessary that it is dry under the house. To place the building, choose a site with a slight elevation.
Wooden house for a friend
How to build a doghouse? The set of materials for building a dog house made of wood is the same as for constructing any wooden structure. You need thin timber, plywood, lining, roofing felt, boards, insulation, nails, sand, glassine and polyethylene.

Important! A doghouse should be simple. The animal does not need complex structures, balconies, capitals and decorative lanterns, even if the owner is willing to spend money on them.
Classic - a kennel made of wood. Coniferous wood is considered the best for dogs, because impregnation of external and internal surfaces with odorous antiseptics is impossible. Such treatment can damage a dog's sense of smell, even if the pet agrees to live in a fragrant home.
All surfaces inside and outside are made smooth; they must be sanded so that the dog does not get hurt. The structure will stand for about 8 years, after which it will be necessary to check whether the boards have rotted or whether it is time to make repairs.

Work order
The construction process begins with the manufacture of the lower frame. Bars with a cross section of 40x40 mm are suitable for it. They are cut to length and width according to the drawing, connected using self-tapping screws to form a rectangle. The joints are reinforced with metal corners.
If the doghouse is intended for a large dog, add 1-2 crossbars from the same timber across the rectangle. The finished frame is sewn up with a board along one side.
The resulting platform is turned upward with the beams, covered with glassine, a thin strip is laid for fastening and nailed, and mineral wool or polystyrene foam is laid on top. You can fix the glassine with stapler clips. The insulation should tightly fill the space between the beams. Glassine is again attached to the top, then clapboard or plywood is stuffed.

For vertical posts, it is better to take a thicker beam, with a cross-section of 100x100 mm. If the roof is planned to be pitched, 4 posts are made from timber: 2 correspond to the height of the kennel, 2 are 10 centimeters higher.
The verticals are located at the corners of the base. The tall ones are installed where the front of the kennel should be. The supports are leveled and secured with self-tapping screws. 2 additional supports should be installed on the sides of the manhole, and 2 more should be placed in the middle of the long walls.
The upper parts of the racks are connected by crossbars, an additional crossbar is installed between the manhole supports. Its location is determined by the selected entrance height.
The outer side is finished with clapboard, the inner side is insulated in the same way as the floor. Plywood, OSB or chipboard are stuffed on top of the insulation inside. The sheathing fasteners on both sides are recessed into the wood so that protruding nail heads or screws do not injure the animal.

The structure is turned over, roofing material is stuffed onto the bottom, turning the edges onto the walls by 5 cm. Bars with a cross section of 100x100 mm are nailed on both sides of the bottom.
The roof is made in the form of a door on hinges. This design allows you to clean the kennel and care for a sick animal. The frame for the roof is made along the inner area of the kennel, insulated, a sheet of plywood or boards are stuffed on top, protruding from all sides 10-15 cm above the base of the roof, the canopy in front is 25 cm. The finished roof is hung on hinges fixed on the back wall of the house, then covered with roofing material. The roof is made of roofing felt, soft tiles or ondulin.
The hole and all ends are covered with platbands. All that remains is to place the kennel in the chosen location.
Important! To prevent rotting and mold formation, it is recommended to treat the lower parts of the wooden structure with an antiseptic, but the dog may react to the smell of the drug. You should choose a processing method that does not disturb the animal, or avoid protecting the wood altogether.
Manufacturing a gable roof
The gable option is suitable for small booths, since the heavy structure will be difficult to lift when cleaning. 8 bars with a cross-section of 50x50 cm are prepared. The length is calculated so that when 2 bars are connected at an angle of 40 0, the ends protrude 20 cm above the box. 2 blanks are knocked together and connected with a longitudinal beam equal in length to the future kennel. 2 more bars are attached to each side of the longitudinal beam. The resulting rafters are to be installed above the kennel box.
The resulting rafters are placed above the box and aligned centrally and vertically. Marks are made on all the bars, along which cuts are cut for fastening. The finished rafters are installed on the frame, the alignment is checked and secured. The rafters are covered with clapboard on top and covered with roofing material.
For winter use, it is advisable to sheathe the rafters from below with plywood, cover them with insulation and glassine, then fill the boards. When building a house with a gable roof, the ends of the box are sewn up after installing the rafters in such a way as to cover the gables.

For ease of removal, long nails are driven into the ends of the vertical posts of the box and the heads are removed. Holes the size of the nails are drilled in the roof gable beam, and the roof is placed on the protruding nails using the prepared holes. The gable roof is completed by a ridge covering the junction of two slopes.
Building a brick booth
Construction begins with site selection and territory preparation. The location for the brick building must be determined immediately; it will not be possible to move it. The selected place is cleared of debris, roots of cut plants, and leveled. The foundation for the booth can be monolithic or strip.
Having marked the perimeter of the future structure on the ground, remove the soil over the entire area or along the perimeter, depending on the type of foundation. Formwork is installed around the pit, sand and gravel are poured onto the bottom, and concrete is poured. After 3-4 days, the concrete will harden, after which it will be possible to begin installing the floor.
A timber frame is laid on the foundation, insulation is placed inside, and the floor is covered with plywood or clapboard. After this, brick walls are laid. Laying is done flat or on edge. The verticality of the structure is constantly checked using a plumb line. Finished walls are insulated from the inside with felt or mineral wool, sheathed with plywood, OSB, chipboard or clapboard. All wooden parts are carefully processed so that they do not have sharp chips or splinters.

A single-pitched or gable roof is made in the same way as for a wooden booth. A wooden box is inserted into the hole. The outside of the kennel can be finished with the same material that covers the country house.
If several dogs or one angry dog permanently reside on the property, the brick kennel can be surrounded by a chain-link fence, creating an enclosure for the animals. The territory of the enclosure is sown with lawn grass or covered with fine gravel.
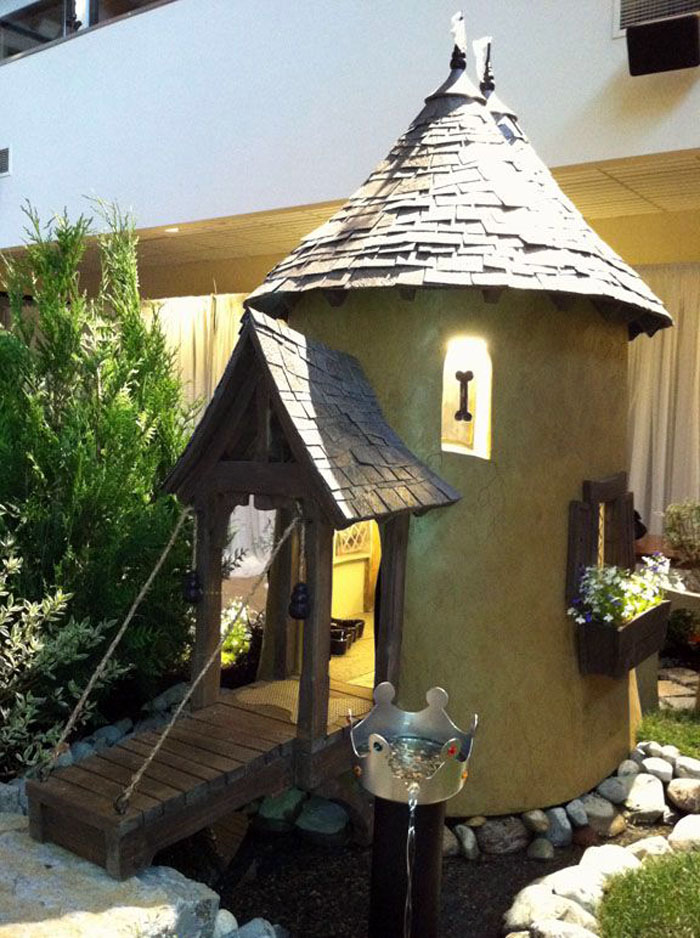
How to make a dog house attractive if the animal is kept behind a fence? To soften the impression of such a design, the house itself can be built in the form of a cottage, a house with a terrace or a castle, and the fence of the enclosure can be decorated with decorative overlays, giving it the appearance of a fortress wall or a garden fence. A chain-link is not a hindrance for a large, ferocious animal; for its safety, it will have to build an enclosure from steel rods.
Dog bedding
To set up a home for your four-legged friend, you need to put a comfortable soft bedding on the floor of the booth. Even dogs with a thick undercoat that can easily tolerate frost are sensitive to high humidity. Bedding will protect your pet from dampness: it is made from straw, hay, sawdust, or a fabric mattress is placed in the kennel.

Fabric bedding and mattresses quickly become damp. They must be dried frequently to remove moisture. Many dogs like to tear the fabric taken out of the kennel and scatter the shreds. Fabric bedding is not suitable for an animal with such habits.
Many owners use shavings and sawdust as bedding. The latter pose a certain danger to the dog; they clog the respiratory tract and eyes, causing conjunctivitis. The shavings fit much better. They smell nice, are soft and keep warm. The chips must be shaken frequently as they cake.

Kennel care
Having figured out how to make a doghouse with your own hands, you need to think about its maintenance. The kennel must be washed from time to time; when washing, the water must completely drain out of the room, or it must be removed with a rag. A removable or folding roof will make cleaning easier and make it possible to dry the inside of the kennel.
The dog house should be comfortable in design and suitable in size. You can assemble a kennel that is comfortable for your dog in a few hours. And additional decor and thoughtful design of the structure will decorate the site all year round. The most popular materials for making a doghouse are metal, brick and wood (especially softwood). But wood is the most environmentally friendly and convenient material to process. In addition, wood is affordable.
The first stage - drawing up a drawing of the kennel
Before you start building a kennel, decide on its appearance and dimensions. You need to add 10-15 cm to the length and height of your dog’s body - then you will get the recommended minimum length and height of the kennel body. Measure the length of the dog's body taking into account the tail. An overly complex design will prevent the dog from moving freely around the house, so we advise you to choose an ordinary rectangular booth.
Using the drawing, you can easily calculate the necessary parameters of the booth.
The roof is often made pitched - many dogs like to sit or lie on the roof of the kennel, spending most of the day there. The entrance to the kennel should also be 10-20 cm higher and wider than the corresponding size of the dog. You can leave more space inside so that the house has two zones - a sleeping area and a “front room”. In the second zone, the dog can lie with its paws extended and its muzzle sticking out through the entrance to observe its surroundings. It is better to make one of the walls of the booth removable - this way you can fully carry out regular disinfection inside the structure.
What materials and tools will you need?
Important! To prevent the dog from splintering its paws, wooden blocks and boards must be well sanded. Apply protective impregnation only to the outer surface of the kennel, otherwise the dog may not like the smell of the solution inside the structure.
Tools needed to build a house:
- hammer;
- screwdriver;
- electric saw (or regular saw);
- pencil;
- ruler.
To keep the kennel warm even in the cold season, you need to take care of its insulation in advance, when constructing the structure.

Pets, just like us, do not tolerate cold well. Create comfortable conditions for him.
For insulation, choose a material that is not afraid of moisture. For example, it could be polystyrene foam, which does not absorb moisture due to special impregnation and composition of the material. It is sold in sheets of different thicknesses, which allows you to choose the desired degree of insulation. Insulation is placed between the outer and inner walls of the booth.
It will be more convenient to build the booth next to the place where you will install it. This should be a section of territory protected from wind and dampness, located next to the house. The surface of the ground under the booth needs to be flat and well lit during the day. It is advisable to consider a canopy or a place under a tree so that the dog has the opportunity to hide from the sun's rays in hot weather. The view from this area must be good so that the dog can fully guard the territory.

Strict adherence to the assembly diagram is the key to the strength of the structure.
In what sequence is the dog house assembled:
- We assemble the frame. The frame of the bottom of the kennel is made of four wooden beams, the length of which is specified by a pre-developed drawing. To strengthen the base structure, additional jumpers are nailed to the frame and the corners are strengthened by installing vertical posts. Nails or self-tapping screws are used to assemble the frame.
- Chipboard or plywood sheets are used as flooring for the booth floor. Walls - wood boards or chipboards - are nailed to the finished frame. Insulation is placed in the space between the inner and outer planes of the walls, which is resistant to moisture absorption and retains heat well. If the walls are single-layer, then the insulating material can be placed in the gap between the finishing layer and the main plane of the wall.
- Wall finishing is installed - wood paneling or plywood sheets. After completing the installation and finishing of the walls, a mat is fixed to the floor of the structure, preferably made of natural and heat-retaining materials. If the booth does not have a division into an interior room and a vestibule, cover the entrance with a rug or thick fabric for the cold season.
- The roof is assembled from boards separately and fixed to the main frame of the booth in finished form. The top needs to be covered with waterproofing material. For these purposes, a covering for the roof of your house, or a material with similar protective qualities, is suitable. The roof can be removable or easily fixed using a quick-release fastener.
- The fully assembled house is covered with a waterproof coating, paint or varnish. Waterproofing on the roof is installed after painting the entire structure.
- The finished kennel is installed on a slight elevation above the ground - this way it will be protected from moisture and cold getting inside from the surface of the soil.
Single-pitch and gable roof - features and differences
The gable roof is convenient for small huts - lifting a large hut when cleaning will be too inconvenient. This option for the upper part of the structure is convenient because it saves materials and space, as it makes the inside of the kennel more spacious with minimal consumption of materials.

A gable box would be appropriate in a region with heavy snow cover in winter.
The lean-to option is more practical for large houses. The horizontal top can be made removable, as it is easier and more convenient to lift it when cleaning the booth.
Important! Another reason to make a pitched roof is the habit of many dogs to sit on such a roof all day long, watching the territory and looking out for strangers.
That is, this option is more practical and convenient. But often a gable roof is chosen for aesthetics and the traditional appearance of a doghouse.
How to care for the booth?
In order for your pet to remain healthy and well-groomed, you need to keep its home clean - clean and dry it regularly. It is better to do this in the summer so that the wood has time to dry completely after cleaning in the sun. If the rug is dirty, be sure to wash it, or better yet, throw it away and buy a new one. As a detergent, use only products purchased at a pet store - this way you will protect yourself from the risk of causing allergies in your dog.

Your pet's home needs care. Periodically it is necessary to dry and disinfect his home.
The building should be repainted with paint that contains the least amount of toxic components and will protect against microorganisms and insects that spoil the wood. Typically, the paint layer is destroyed in 2-3 years; it should also be renewed in the summer so that the fresh coating dries faster.
What else is useful to consider when installing a booth with your own hands?
If you are building a dog kennel yourself, make the flat roof strong enough - dogs love to lie on it, and if the dog is large, the structure must have increased strength.
If the dog is aggressive or usually tied to a chain, make an enclosure around the booth. Then your guests will not be afraid of the animal, and the dog will be able to walk around the territory allocated for it.

If your pet is seen to be aggressive, it is appropriate to connect the booth with an enclosure.
Wooden dog houses, photos of which can be seen on the screen, can be made not only of a traditional look, but also with an original design in the form of a smaller version of a mansion, castle or a cozy house with vegetation on the roof. Wooden doghouses are made in the form of vans, huts and buildings of different styles.
Important! The roof of the kennel also needs to be insulated, especially if the pet will live in it all year round. This is done before attaching it to the main structure. If the top is flat, make it slightly sloping so that rainwater can flow along the edge of the roof rather than stagnate and damage the roofing. If it often rains in your area, you cannot do without a canopy before entering the kennel.
Also remember that not all dog breeds are able to live outside in winter. Some species are not adapted to survive in cold conditions and will get sick if they are placed in a booth all year round, even if it is well insulated. Make sure your pet will love his new home and make sure he feels as comfortable as possible in it. Your dog will certainly like a fairly spacious, but also cozy new home.
Video: DIY doghouse
We will send the material to you by e-mail
When a family living in a private or country house gets a four-legged guard, you should immediately worry about the pet’s place of residence - not everyone likes living together with a dog. The editors of the online magazine website offers to solve the problem of housing a pet and offers recommendations on how to make a dog house with your own hands.
This is protection from any weather conditions and a comfortable existence for the dog on the site.
When people build a house for themselves, they do not think about making it ugly and uncomfortable, and the same with a dog: a living creature requires good living conditions.


The slope of such a roof is directed away from the entrance so that water does not drip onto the animal’s nose, protruding from the passage, creating a puddle under the booth.


A special feature of gable booths in harsh places of residence is the addition of an attic floor - this will minimize heat loss.
Advice! It is easy to provide storage space for dog supplies under the roof.


The convenience for a dog in a building with two rooms is that when it rains or snows, the animal can calmly survey the surroundings of the yard, and when frost strikes, it can sleep off in a warm bedroom.


Not everyone can build two-story palaces. And not every dog will be interested in the second floor. For large animals such buildings are impractical, and small dogs can easily climb up to survey the territory. In this case, the sleeping place can be placed upstairs, and the bottom can be simply a shelter from the rain.


What materials are dog houses made from?
Let's figure out how to make a dog kennel with your own hands, and what materials you can use to build a good house. You can build from almost anything, but let's focus on the most accessible and common materials: wood and brick. Coniferous wood has proven itself well. And it is not at all necessary to build a kennel from treated boards; you can make a real log house. A very budget option involves the use of plywood and floorboards. To ensure that the wood lasts a long time, the outside is treated with an impregnating protective compound, and the inside is insulated, if necessary. Brick is more monumental: such booths are heavy and massive, so it is better to install them on a strip foundation.
Related article:
Aviary for dogs: photos and types of structures with descriptions, what building materials are needed to build a dog pen on your own, how to cover the floor of the enclosure and what is the best material to build walls from, the dimensions of street structures, their arrangement, how to make an enclosure for an apartment - read the publication.
How to decide on the size of a doghouse
When you need a booth for a large dog of such breeds as the Alabai, Tibetan Mastiff, or St. Bernard, it is important not to make a mistake with the size: a growing dog should not feel like a salted mushroom in a jar in the house. And it’s not comme il faut for a small dog to sit in a huge building in winter - there’s no way it can warm it with its breath.

We measure the pet - the length of the kennel should be +5 cm from the length of the animal from nose to tail. The width is indicated based on the height of the dog plus 5 cm. Now you need to measure the circumference of the chest: the gap should be wider by the same 5 cm and 5 cm longer than the height of the animal at the withers.
Advice! If the dog has not yet grown up, then you can rely on indicators from reference books.
The height of the kennel should exceed the height at the withers by 15 cm: the dog should not touch the ceiling with its head if it wants to sit inside. The depth is designed to allow the pet to lie comfortably on its side and be able to stretch its paws freely. The height of the animal at the withers is increased by 15 cm and depth is obtained.
When designing a kennel with vestibules, the dimensions of the animal are calculated: small breeds will be comfortable in a room 75 cm long, 65 cm wide, 65 cm high, but a shepherd dog will appreciate 120-125 cm in length. Very large animals will need a room length of 145 cm, a width of 105 cm and a height of 100 cm.
How to choose a location for a dog house
The choice of location is determined by the desire of the owners to create good living conditions for the animal:
- Do not place the kennel in an open sunny area;
- the place should not be at the crossroads of all conceivable and inconceivable winds;
- placing a booth close to a fence with gaps will result in a twitchy, nervous animal. The animal can be teased by children and simply annoyed by people walking by;
- the same applies if the street behind the fence is extremely noisy, it is better to install the building not close to the fence behind which there is such a loud life;
- When installing a booth in a lowland, you should be prepared for the fact that the dog will move into the house in the first spring, since its home will simply float in the water.

How to insulate a doghouse
Do you need a warm doghouse? If the animal is lucky enough to live “in the south,” then we can congratulate the owners on the fact that they do not need to bother with insulating the dog’s home. The northern regions will have to invest here again.
Sawdust, polystyrene foam and mineral wool are good insulation materials. The floor, walls, and roof are subject to insulation. Mineral wool, polystyrene foam or ordinary sawdust are used as insulation. Insulation is laid on the walls and roof from the inside. Then the insulating material is covered with a vapor barrier. The floor is insulated from below with ordinary sawdust.
How to build a wooden dog house with your own hands
Having thoroughly admired the photos of dog kennels on the Internet, it’s time to start creating a dog house with your own hands from wood.

Wood is an excellent material that has been tested for centuries. Yes, such a kennel will last less than a brick one, but next time it will turn out to be a palace. If desired, you can build a dog house from pallets and pallets, which can easily be covered with plywood sheets. But if you approach the matter thoroughly, you prepare both good material and a set of tools. Blockhouse or slab are also recommended as building materials: the products are massive, durable and chic.
Video about building a wooden booth
How to prepare a drawing for making your own dog house
The first step, if you need to assemble a house with your own hands, is to prepare a sketch and drawings of a dog kennel.


First, we draw a sketch of the future structure, then we measure the size of the animal. Based on the sketch, we create a drawing in two projections and indicate all the dimensions on it. If you have no experience in construction at all, then it is better, in addition to the general assembly drawing, to draw individual elements, this will make it easier to navigate the details.
Floor and frame
For stationary products, it is better to make a columnar foundation; for portable ones, hemmed thick boards in a couple of rows will do.

A sheet of plywood is laid on the frame. When the bottom is ready, it is turned over so that on the other side foam plastic is placed in the space of the bottom for insulation. It is covered with plywood.
Now they begin to install vertical racks from square bars at the corners of the bottom. They are secured with steel corners. It is worth making sure that the vertical level does not go astray. The top frame is screwed onto the columns and intermediate posts are installed if the booth is supposed to be a two-room one.
Rear wall and front part
The back wall and front can be cut directly from plywood. To do this, you will need to comply with all the dimensions indicated on the drawing and an electric jigsaw. If the assembly is carried out from an edged board, then, again, to make the work easier for a beginner, you can draw a ready-sized template directly on the ground and check it against it. Having sawed off unnecessary parts of the boards, you can nail the elements onto the frame.
Roof and side walls
It doesn’t matter whether it is decided to install a single-pitched or gable roof - any option must be removable. This will help for free access inside the building to change bedding and carry out disinfection.

For a pitched roof, take a 40x40 cm beam and an OSB sheet. The bars are knocked into a frame corresponding to the internal dimensions of the building. An OSB sheet is laid on top. The roof is insulated using polystyrene foam, which is covered with a moisture-proofing film. Plywood is laid on the insulation. Take into account that it should be 8-10 cm larger than the frame on the side and back, and 18-20 cm in the front.

How to make a doghouse with your own hands from brick
A small bob is unlikely to need a serious brick building, but such a house will come in handy for huge watchdogs.

To build a strong, good-quality brick kennel, mark the future building on the ground and begin to dig a trench around its perimeter. A size of 25x25 cm is sufficient - concrete is poured into the trench and further work begins only after a few days. First, lay out the walls, regularly checking the compliance of all verticals and angles, which should be perfectly straight. Where the hole is located, a gap of several bricks is left. Once the required masonry height is reached, a wooden board is laid over it. Further masonry will be continuous. The inside of the house must be completely insulated with clapboard or sheathed with wooden boards. The roof is made separately and installed on the attic wooden floor.


Again about the drawings and other nuances of making a dog house with your own hands
Not everyone understands the value of a good drawing: the more carefully the details are worked out at this stage, the less chance there is of an error during construction. You should not rely on the fact that your hands will feel the material themselves; if you want high-quality, durable work, then you should not neglect the drawings and step-by-step instructions.
Recommendation! To create a drawing, you can use the services of architectural programs.
Site layout
We have already discussed above where the kennel should not be placed. Let us clarify that not every site has a free suitable place, but that’s what human hands are made for, to correct shortcomings. Any place can be brought to mind: to combat dampness, drainage and raising the ground level are used. A drainage trench will also help here. Ideally, a house with a platform can be placed on stilts.
If the dog will sit on a chain, there is the option of installing a long steel wire for greater freedom for the pet. The chain will slide along the wire, the dog will be able to run at a distance of the extended chain and return to the kennel. You can concrete the area - but keep in mind that dogs love to dig holes and hide bones there. Therefore, if you want to leave this opportunity for your pet, then you should concrete the space around the booth, otherwise the dog can dig up the foundation, and in the spring it will be washed away by streams of water.
Preparatory work and pouring the concrete layer
The roots of stumps and trees are removed from the territory, the area is leveled, a trench is dug (for a strip foundation) or holes (for a pile foundation). No difficulties are expected at this stage.
The nuances of making a house for a dog in an apartment with your own hands
The apartment does not require insulation of the dog's house, which saves building materials, finances and personal energy.

You can build such a house from scratch, using the recommendations for building a coffee table, but leave free space inside instead of drawers.

The structure is built in the same way as a wooden building for the street.

For large breeds, it is easier to take any old chest of drawers and restore it to match the interior of the room by laying bedding inside the makeshift home.

To make a dog house with your own hands, you will undoubtedly need drawings and dimensions of the structure. For example, if it is intended for a German Shepherd, then not only will a larger box be required, but also increased mechanical strength, since this is a heavy and strong dog. Of course, the principle of construction will remain the same, no matter what the dog’s blood and size, but he also wants to sleep in a place well protected from bad weather and frost.
And I feel warm and cozy here
Dimensions and drawing of the booth

Proportions of a doghouse relative to its owner
To build a dog kennel in compliance with all the rules, it is important to take into account the dimensions of the animal - height, length and width. We will not talk about any individual case, but will simply focus on the three most common types:
- For small breeds, for example, a dachshund needs a room 70-75 cm long, 60-65 cm wide and 55-60 cm high.
- For medium-sized breeds, such as the German Shepherd, you will need a building 120-125 cm in length, 75-80 cm in width and 80-85 cm in height.
- But for large animals like the Portuguese Mountain Shepherd, Caucasian, Deerhound, Moscow Greyhound or Mastiff, you need a structure 140-145 cm long, 100-105 cm wide and 95-100 cm high.
You can also use the chart below to determine the size of a kennel for your pet.
In this case, you have become familiar with the general requirements that can be used to guide you when drawing up a drawing or sketch in construction. But if you wish, you can make a VIP project that is suitable specifically for your pet - this is not at all patricianism or elitism, but quite reasonable and justified care for the animal.

Another diagram of a doghouse with dimensions
Measure your dog's chest in width - it should fit freely into the opening of the booth, therefore, to the resulting parameter you need to add from 5 to 8 cm for the total width (2.5-4 cm on each side). The height of the hole can be calculated by determining the height of the dog at the withers and adding another 5 cm to this indicator so that the dog can climb into the kennel simply by bending its head.
To create a VIP project for a dog kennel, you need to take into account the height of your pet from the ground to the tip of the head (H - the height of the box), the height at the withers (h + 5 cm - the height of the manhole), and the width of the kennel is approximately equal to its height.
What you will need to assemble the structure
Since such a design can only be made if certain materials and tools are available, we will consider these points in more detail. But I want to indicate all possible options, and you can choose according to your specific situation.
What materials are needed
Note. If you decide to make a stationary structure, then it is advisable to install it on a columnar foundation. For a portable kennel, a foundation is not needed - it is enough to hem pieces of timber or thick boards in one or two rows to the bottom of the box - this is for.

Moisture-resistant plywood of different thicknesses
Here is a list of materials that may be useful to you during construction, but you will need to make a choice from them:
- unpolished block – 50×50 mm;
- rail – 40×25 or 50×25 mm;
- board 100×50 mm or 70×40 mm;
- planed edged board, but better tongue-and-groove - thickness 20-25 mm (for walls) or wooden lining of the “collective farmer” type;
- planed edged board, but better tongue-and-groove - thickness 40 mm (for the floor);
- moisture-resistant plywood or OSB-3 (OSB class 3, waterproof);
- insulation – polystyrene foam, extruded polystyrene foam (penoplex) or mineral basalt wool;
- roofing material - corrugated sheeting, metal tiles (roofing felt, as an exceptional case);
- fasteners - self-tapping screws, steel corners and linings;
- solid brick - ordinary or double (red) or silicate;
- cement, sand, crushed stone.
Attention! All lumber, with the exception of moisture-resistant plywood and oriented strand board of the 3rd or 4th class, should be treated with an Anti-Rot antiseptic. After such treatment, the wood will hardly absorb, therefore, its service life will significantly increase.
To ensure that you do not make a mistake when choosing plywood, you should pay attention not to the seller’s assurances that it is not afraid of moisture, but to the product labeling. For this purpose, I specially compiled a table that shows all the markings that belong to moisture-resistant plywood.
| Marking | Dimensions, mm | Thickness, mm |
| FC | 1525×1525 | 3 |
| FC | 1525×1525 | 4 |
| FC | 1525×1525 | 6 |
| FC | 1525×1525 | 8 |
| FSF | 2440×1270 | 6,5 |
| FSF | 2440×1270 | 9 |
| FSF | 2440×1270 | 12 |
| FSF | 2440×1270 | 15 |
Tools for work

Cutting plywood with a hand-held circular saw
Of course, it is most convenient to build any structure using power tools, but you may not have them. Therefore, along with them, I will also bring the usual carpentry tools for handwork:
- hand or stationary circular saw and/or electric jigsaw. You can use a hacksaw for wood;
- electric drill or screwdriver (cordless drill) with a set of drill bits. You can use a shaped screwdriver and a brace;
- metric tape measure, pencil;
- construction corner.
Watch a video on building a warm kennel for a dog.
Video: Do-it-yourself warm dog house
Construction stages
The installation of the entire structure can be divided into stages. But the very first of them (making a foundation) may be unnecessary for a portable structure. Besides. The roof can be made single-pitch or gable, but this will also affect the manufacture of the frame.
Columnar foundation

Pillar foundation for a dog house
Making such a foundation is very simple: to do this, you need to dig four holes 10-15 cm deep, where the supports will be built. When you build a dog house with your own hands, then, of course, you should already have the necessary drawings and dimensions, but you can also just draw a simple sketch on a piece of paper. Therefore, it will not be difficult for you to determine the perimeter - make holes in the corners.

Standard parameters of ordinary brick
Fill the bottom with a sand-crushed stone cushion 5-7 cm high and compact it, and then pour the same layer of concrete there. The next day, fold the columns from (you can see its dimensions in the image above) - they will turn out to be 250x250 mm in perimeter, according to the standard. The height of the post from the ground should be about 10-15 cm - this will not allow water to flow into the kennel during heavy rains or melting snow. Level the supports.
Frame for gable roof

Frame for plank floor
The next step in the step-by-step instructions is to make a frame for the plank flooring. In this case, a board of 100×50 mm, 70×40 mm or a block of 50×50 mm is suitable - it depends on the weight of the animal and your desire. It is not necessary to use exactly the dimensions indicated in the image - they may not be suitable in your case. It is best to start from the specific dimensions of your dog.
If you cut all four pieces, precisely observing their length, then there will be no problems with the diagonals - they will turn out the same. Reinforce the joints of the boards with reinforced perforated steel corners and then check the diagonals - they should be the same.

Cover the bottom of the frame with moisture-resistant plywood
To make a warm floor in the kennel, you need to line the bottom of the frame with moisture-resistant thick plywood (select markings and thickness using the table). Once you screw the sheet to the frame, any play will disappear. If the area is large, then you can add a transverse or longitudinal jumper from an identical board - it will serve as a log.
Note. In the case when the structure will be installed on a columnar foundation, the frame, after checking the diagonals, is screwed to the supports with anchors. Roofing felt is first laid on the bricks - this is cut-off waterproofing.

Ready frame for a dog house
Now it’s up to the vertical posts of the frame - start with four risers in the corners, secure them with steel corners and secure them with temporary braces from scraps so as not to knock down the vertical level. After this, screw on the top trim and insert the intermediate posts. In this case, you can use a 100x50 mm or 70x40 mm board, or a 50x50 mm block - it all depends on the size of the booth and the dog.
Rafter system

Simple gable rafter system
The next stage is the assembly of the rafter system, where the number of pairs of rafter legs depends on the depth of the booth and can be from two to four. This number also depends on the roofing material (hard steel sheets or soft roofing felt).
There is one more nuance in the installation of rafters - roof insulation. For example, you make a dog house with your own hands, the drawings and dimensions of which were determined by the dimensions of your animal, but at the same time you live in a cold region. If this structure is intended for huskies, then everything is in order - they sleep peacefully in the snow even in 50-degree frost, but other dogs cannot do this. This means that under the rafters you need to install a continuous sheathing made of thin edged boards, plywood or OSB, lay insulation and waterproofing (thick polyethylene will do) and only after that screw the sheathing under the roof.

Method of resting the rafter leg on the mauerlat
It is most convenient to make landing cuts on the rafter legs, as shown in the photo above. This way the legs will rest against the mauerlat (upper frame) and in addition you will fix them on the side with perforated steel corners. Screw a 50x50 mm block as a ridge beam.
Walls, floor and roof

Insulating the floor in a dog house
In this case, the same insulating materials that you intend to use for the walls and roof are suitable. There are no special recommendations here either - a layer of waterproofing between the joists, if you doubt the moisture resistance of the subfloor, then insulation, waterproofing again and then installation of the plank flooring.

The principle of covering walls with plywood
You will most likely also be insulating the walls, so it is more convenient to start covering the sides and ends from the inside of the box. You can use different lumber for this purpose - plywood, OSB or board, but in any case there should be no gaps. After the internal cladding, install insulation between the frame posts and cover it with a waterproofing film, and then cover it.

The booth is ready for use
Now all that remains is to lay the insulation under the roofing material on the bottom continuous sheathing. After this, cover it with polyethylene for waterproofing and install the cladding itself. In the top photo you see that the booth is covered - this is not only reliable, but also beautiful, and you can also choose the color to match the roof of the house. A decorative metal corner is installed on the ridge, which not only decorates the structure, but also prevents leakage.
Shed with a pitched roof

Dog kennel with pitched roof
In this case, the frame is modified in accordance with the slope of the roof. That is, the front pillars are higher than the rear ones, and the intermediate pillars are of medium size, but they are installed only after attaching the upper trim. Everything else is no different from construction with - the same need for insulation and waterproofing, as well as treating the wood with an antiseptic.
Note. The slope angle of a pitched roof can be at least 5⁰. But even if you make it larger, the snow will still linger on the roof. Therefore, in order to avoid critical loads (this mainly applies to the northern regions), snow should be removed periodically.
Video: Installation of a doghouse
Conclusion
It’s up to you to decide what kind of dog house you’ll make yourself. Here you can take as a basis the drawings and dimensions given in this article, but it is best if, using the guide, you draw up a project based on the dimensions of your pet. He will be grateful to you, although he will not be able to express his feelings in words that you can understand, but he will compensate for this with his devotion.
Greetings, my dear readers.
Today I will show you how to make a simple DIY dog kennel. It’s not for nothing that I say simple, since the kennel will be without frills, decorative trims and a gable roof. The booth will have a pitched roof, insulated and will be assembled literally from scrap materials :)
Of course, you can just buy a ready-made booth, but by doing it yourself you will not only gain invaluable experience, but also save money, since the finished product is not cheap.
Materials and tools for the kennel
So, friends, to build a doghouse with my own hands I needed the following materials:
- boards 50 mm × 50 mm and boards 100 mm × 25 mm
- wood screws 52 mm long
- screwdriver
- hacksaw with large teeth
- construction tape
- pencil
- 1 sheet of slate for the roof (I used metal)
- some roofing felt for waterproofing
- also used hardware - corners
- plywood sheet 5 mm
- paint or antiseptic impregnation for wood
Dog kennel - drawings
In order for your pet to feel at ease in its new home, you need to decide on the size of the kennel. To do this you will have to measure your dog. We are interested in the height at the withers, the height of the back, the length and width of the chest. Based on the results obtained, we make a drawing of a dog kennel.
Based on the measurements obtained, we calculate the dimensions of the future kennel.
- So, the height and width of the kennel is the height of the pet at the withers + 5 cm
- The depth of the kennel is the length of the dog + 5 cm
- The width of the hole is the width of the chest + 5 cm
- The height of the hole is the height of the dog’s back + 5 cm
IT IS IMPORTANT TO KNOW:
You should not make the kennel too spacious, since in cold weather the kennel is heated using the pet’s own heat - 5 cm is enough.
How to make a dog kennel with your own hands - video
DIY dog kennel - photo
So, let's get to work.
- Preparing material for the kennel

First, I sawed the bars to size 50 mm × 50 mm. I prepared blanks for the floor, the base of the walls and the top of the kennel. During the work, the kennel will be insulated, so I immediately prepare polystyrene foam. To insulate the dog kennel I will use pieces of polystyrene foam 3 cm thick, you can also use polystyrene foam, but since I have leftovers from the renovation, they will be used for future use :)
I will seal the gaps between the insulation with polyurethane foam.
IT IS IMPORTANT TO KNOW:
For a dog kennel made of timber, it is better to use softwood timber. If you want to treat the wood with an antiseptic, you must wait until the foreign odors have completely disappeared before letting your pet in.
- Floor assembly
To fasten the bars I use wood screws


And here is the result

The insulated floor for the dog kennel is ready.
- Wall installation

The rear bars are made lower than the front ones to maintain the roof slope. I also used metal corners to strengthen the structure.

The frame of the future kennel begins to take shape). Then I reinforce it with additional jumpers.

To finish the inner sides of the walls and ceiling, I use 5 mm plywood and begin insulation. For insulation, I use all the pieces I have left, first foaming the sides of the polystyrene foam.

More

The fully insulated frame of the dog kennel is ready. Actually upside down :)

I begin to sheathe the frame with a board 100 mm wide and 25 mm thick. I use roofing felt for waterproofing.

The floors are sewn, let's move to the back

In this way we get a simple dog kennel made of timber.

IT IS IMPORTANT TO KNOW:
Roofing felt for a doghouse is laid in such a way that there is an overlap from above - from the roof to the floor. So that the water flows down freely without flowing into the kennel itself.
- Roof installation
Conclusion
So, friends.
As you can see my friends - make your own dog kennel not quite difficult. All you have to do is apply a little handicraft and follow my step-by-step instructions!
Good luck everyone!
